Burnt Honey Medovik
Burnt Honey Medovik is a layered Russian honey cake known for its soft, thin layers and a rich, slightly caramelized honey flavor that’s both sweet and a little smoky. The…
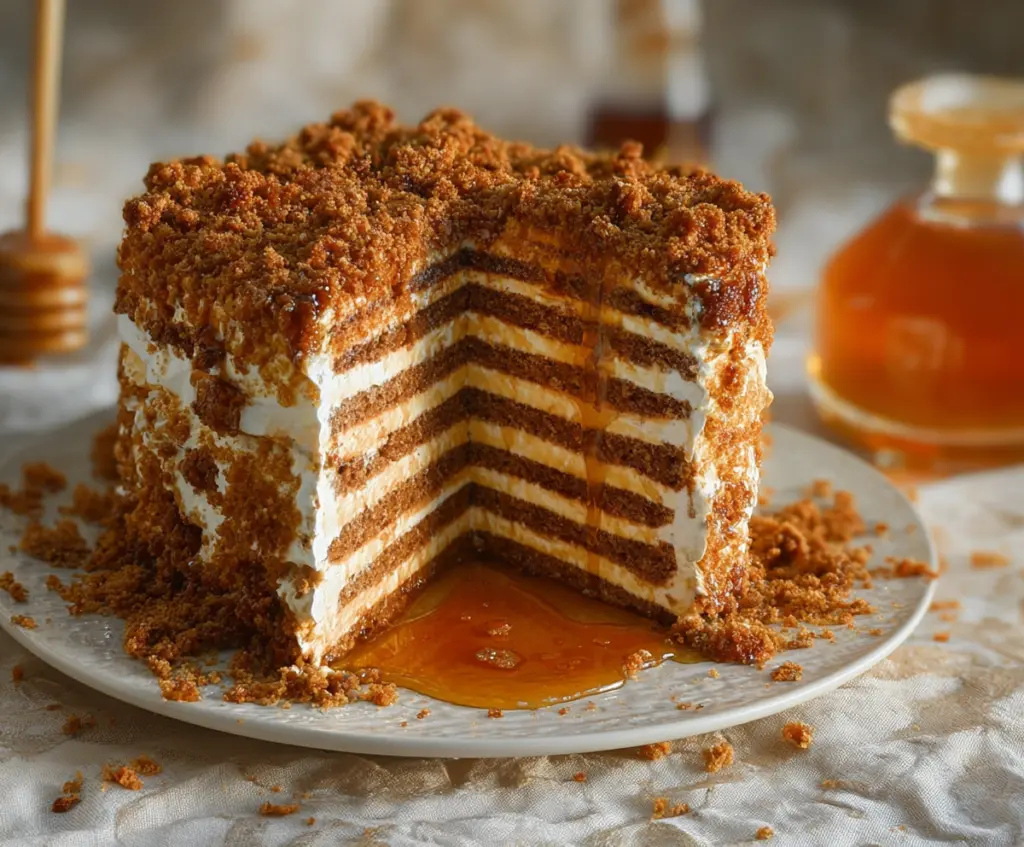
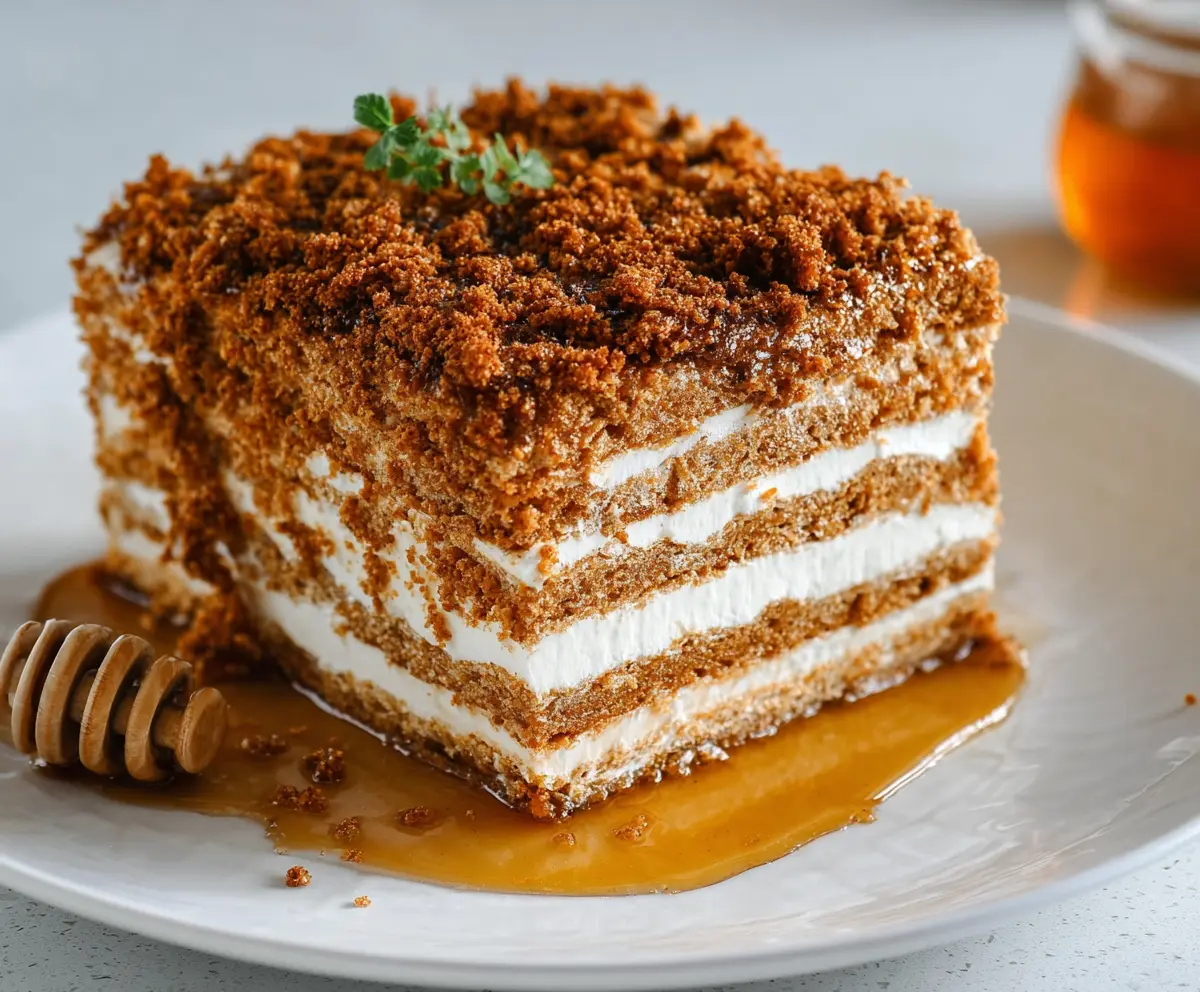
Tip: save now, cook later.Burnt Honey Medovik is a layered Russian honey cake known for its soft, thin layers and a rich, slightly caramelized honey flavor that’s both sweet and a little smoky. The textures are wonderful—delicate cake layers paired with creamy filling in between, creating a cake that’s both light and satisfying. The burnt honey adds a unique twist, giving the cake a deeper, more complex taste without overpowering the sweetness.
I love making Medovik because it takes a bit of patience, but the results are so worth it. My favorite part is watching the honey transform as it cooks and seeing how it brings everything together when spread between the layers. It’s a recipe that invites you to slow down a bit and enjoy the process. Plus, it always brings a warm, cozy feeling to my kitchen.
The best way I’ve found to enjoy this cake is with a hot cup of tea, especially on a cool afternoon. It’s the kind of dessert that’s perfect for sharing with friends or family because each slice feels like a little celebration. If you’ve never tried a layered honey cake before, this one is a lovely place to start—it’s sweet, soft, with just enough caramel flavor to keep things interesting.
Key Ingredients & Substitutions
Honey: The star of the recipe, honey gives Medovik its classic sweetness and aroma. Use a good quality, mild honey. If you prefer a lighter flavor, try acacia honey. For a deeper taste, buckwheat honey works well.
Butter: Unsalted butter helps balance the sweetness and adds richness. You can substitute with margarine, but real butter gives a better flavor and texture.
Flour: All-purpose flour is best here for a tender but structured layer. If needed, use cake flour for a softer cake, but the layers might be more fragile.
Heavy Cream & Cream Cheese: These create the creamy filling. You can swap cream cheese with mascarpone or sour cream for a slightly tangier taste. For a lighter option, use Greek yogurt but expect a different texture.
How Do You Get Perfect Thin Cake Layers Without Cracking?
Rolling and baking thin layers is key and can be tricky. Here’s how to get them right:
- Roll dough out evenly on a floured surface to about 1/8 inch thick. Dust both the dough and rolling pin with flour to prevent sticking.
- Use an 8-inch round template and trim carefully; leftover scraps can be crumbled for topping.
- Don’t overroll—too thin layers crack easily.
- Bake at 350°F (175°C) for just 5-7 minutes per layer. Watch closely to avoid burning, but allow edges to get golden brown.
- Let layers cool completely before handling; warm layers are fragile and tear easily.
Patience and gentle handling make the difference, so take your time. These thin, golden layers create the cake’s signature delicate texture.
Equipment You’ll Need
- Double boiler or heatproof bowl over a pot – perfect for gently melting honey and cooking the egg without scrambling it.
- Mixing bowls – one for dry ingredients and one for whipping cream to keep things organized.
- Rolling pin – helps you roll out the dough thinly and evenly for those delicate cake layers.
- 8-inch round cake pan or bowl – use as a template to cut uniform cake rounds easily.
- Baking sheets lined with parchment paper – prevents sticking and makes cleanup easy.
- Electric mixer or whisk – great for whipping the cream filling to soft, fluffy peaks.
Flavor Variations & Add-Ins
- Swap cream cheese for mascarpone in the filling for a richer, slightly tangier taste that pairs well with honey.
- Add a teaspoon of cinnamon or nutmeg to the dough for warm spice notes that complement the caramelized honey.
- Mix in toasted chopped walnuts or hazelnuts between layers for extra crunch and a nutty flavor.
- Drizzle chocolate ganache over the top instead of honey for a chocolate-honey twist that’s indulgent and beautiful.
Burnt Honey Medovik
Ingredients You’ll Need:
For the Cake Layers:
- 1/2 cup (170g) honey
- 1/2 cup (100g) granulated sugar
- 1/4 cup (56g) unsalted butter
- 1 large egg
- 1 3/4 cups (220g) all-purpose flour, plus extra for dusting
- 1 teaspoon baking soda
- Pinch of salt
For the Cream Filling:
- 3 cups (720ml) heavy cream
- 1/2 cup (100g) granulated sugar
- 8 oz (225g) cream cheese or mascarpone, softened
- 1 teaspoon vanilla extract
For the Crumble Topping:
- Reserved crumbs from cake layers, finely crushed (about 1 cup)
For Garnish and Serving:
- Additional honey for drizzling
How Much Time Will You Need?
This recipe takes about 45 minutes to prepare and bake the layers and filling. Then, you’ll need to chill the cake for at least 6 hours, or overnight, to let the layers soften and the flavors blend perfectly. Plan ahead to enjoy the full richness of the Medovik!
Step-by-Step Instructions:
1. Prepare the Cake Layers:
Place the honey, sugar, and butter in a heatproof bowl over simmering water (a double boiler). Stir gently until the butter and sugar melt, and the mixture starts to bubble and turns a nice amber color, giving the burnt honey flavor. Remove from heat.
2. Add the Egg:
Quickly whisk the egg into the hot honey mixture until smooth. Return the bowl to the double boiler and whisk constantly for 1-2 minutes to lightly cook the egg without scrambling it.
3. Mix Dry Ingredients:
In a separate bowl, sift together the flour, baking soda, and salt.
4. Make the Dough:
Slowly add the dry ingredients into the honey mixture, stirring continuously until a sticky dough forms. When cool enough to handle, knead gently on a floured surface until smooth.
5. Roll the Layers:
Divide the dough into 7 equal pieces. Roll each piece out thin (about 1/8 inch thick) on a floured surface. Cut using an 8-inch round pan or bowl as a guide.
6. Bake the Layers:
Preheat oven to 350°F (175°C). Bake each dough round on parchment-lined baking sheets for 5-7 minutes or until golden brown with slightly darker edges. Let cool.
7. Prepare the Cream Filling:
Whip heavy cream with sugar to soft peaks. In a separate bowl, beat cream cheese or mascarpone until smooth. Fold cream cheese into whipped cream with vanilla until fully combined.
8. Assemble the Cake:
Place a cake layer on your serving plate and spread with cream filling. Repeat with all layers, covering the top and sides with cream.
9. Add the Crumble Topping:
Finely crumble leftover cake scraps and press onto the cake’s sides and top.
10. Chill and Serve:
Refrigerate for at least 6 hours or overnight to let the cake soften and flavors meld. Before serving, drizzle with extra honey for a lovely shine and added sweetness.
11. Enjoy Your Medovik!
Use a sharp knife to slice carefully. This cake pairs wonderfully with tea or coffee for a cozy treat.
Can I Use Frozen Dough for the Cake Layers?
It’s best to use fresh dough for rolling and baking the layers, but you can freeze the dough portions wrapped tightly in plastic. Thaw completely in the fridge before rolling out to prevent cracking.
How Long Should I Let the Medovik Chill?
The cake needs at least 6 hours in the fridge, but overnight chilling is ideal. This allows the layers to soften and the flavors to meld, giving you that classic tender texture.
Can I Substitute the Cream Cheese with Something Else?
Yes! Mascarpone works wonderfully for a richer filling, and you can also use sour cream or Greek yogurt for a tangier twist. Just keep the consistency creamy enough to spread between layers.
What’s the Best Way to Store Leftovers?
Keep leftover Medovik refrigerated in an airtight container for up to 3 days. The cake actually tastes better after sitting a bit as the flavors deepen. Slice and serve chilled or at room temperature.