Halloween Graveyard Dirt Cups
Halloween Graveyard Dirt Cups are a spooky and fun treat that's perfect for any Halloween party or just a playful snack at home. These cups layer creamy pudding with crushed…
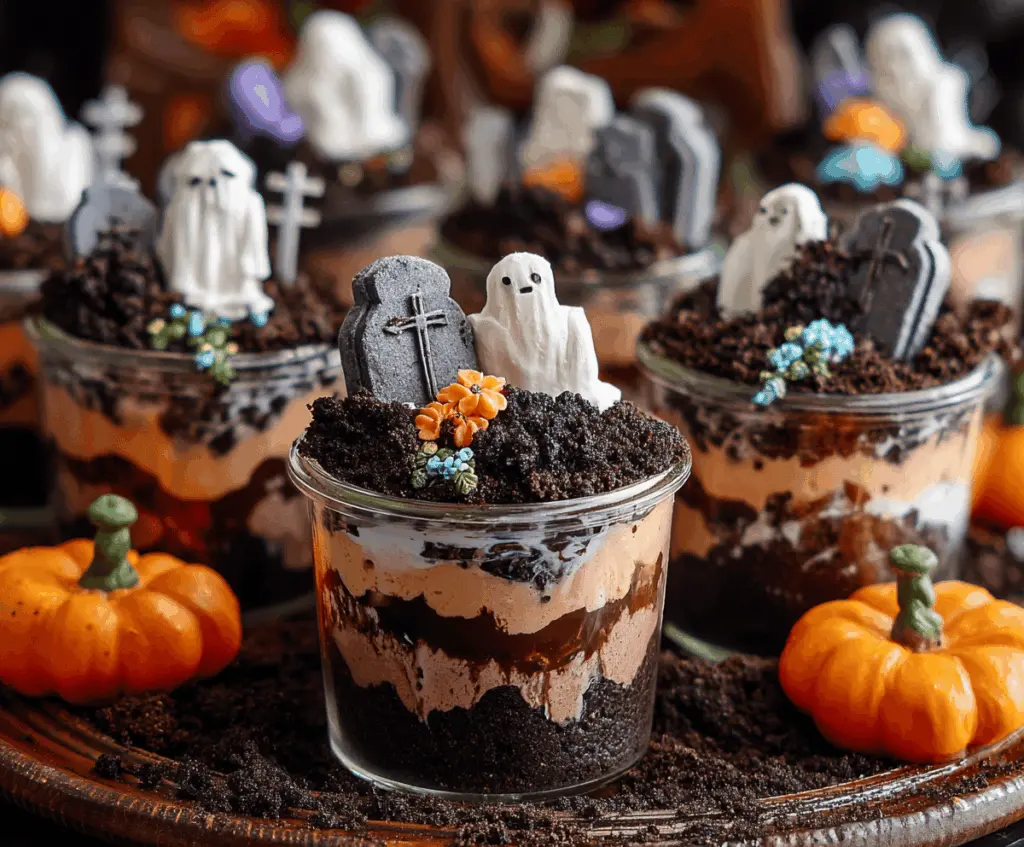
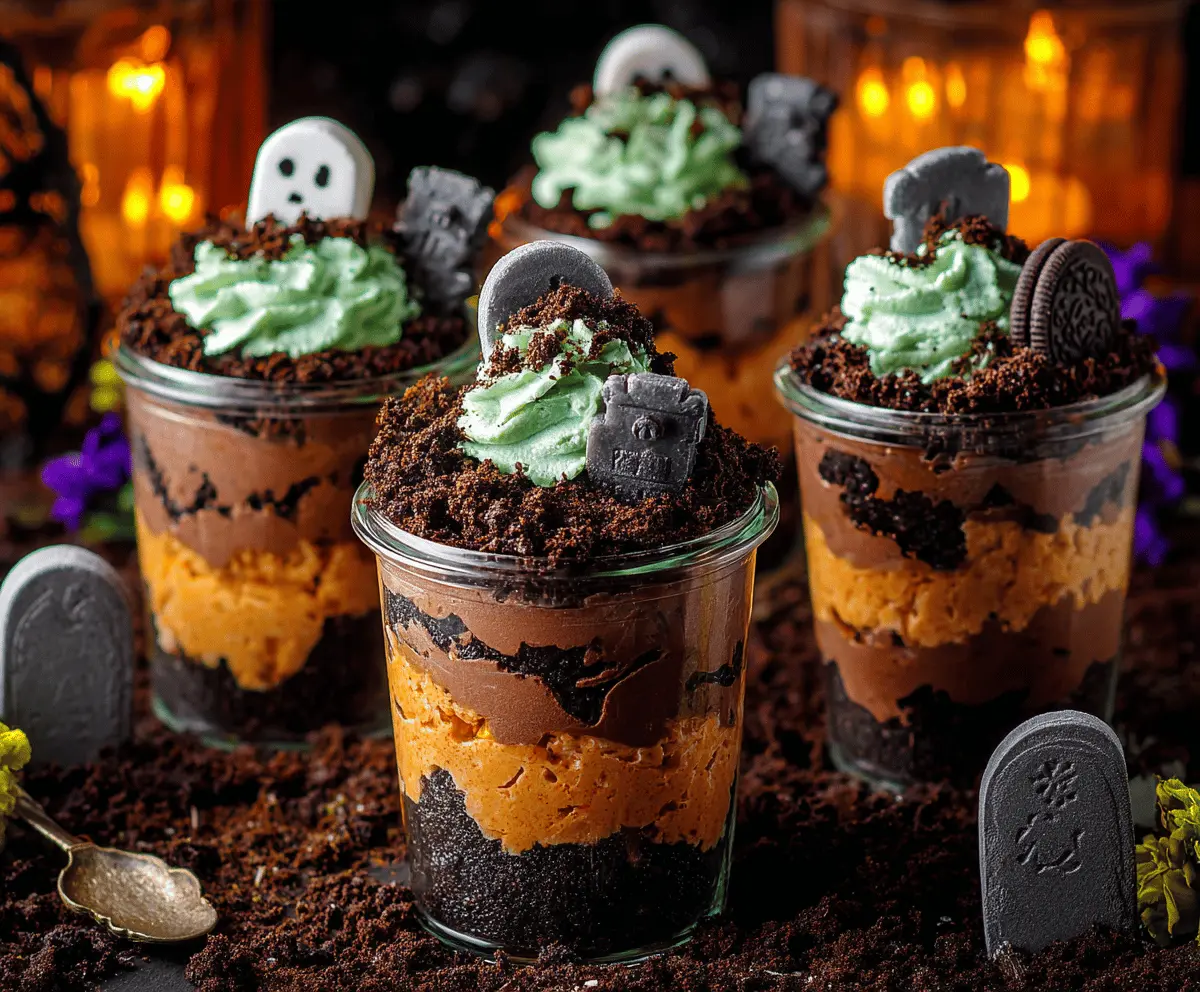
Tip: save now, cook later.Halloween Graveyard Dirt Cups are a spooky and fun treat that’s perfect for any Halloween party or just a playful snack at home. These cups layer creamy pudding with crushed chocolate cookies to create a dirt-like texture, topped with gummyworms and edible tombstones to bring the graveyard theme to life. The mix of smooth pudding and crunchy cookie bits makes every spoonful a little adventure in texture and flavor.
I love making these cups because they’re surprisingly easy and always a hit with kids and adults alike. One of my favorite parts is arranging the gummy worms and little cookie tombstones on top—it’s like crafting a tiny spooky scene you can eat! Sometimes, I even add a dollop of whipped cream for an extra creamy touch that balances out the chocolate.
These dirt cups are great for sharing at Halloween parties or for a fun treat after a night of trick-or-treating. I find that everyone enjoys the playful presentation and the mix of chocolate and creamy pudding, which feels indulgent but not too complicated. If you’ve never tried them, I’d say go for it—just make sure to have plenty of spoons ready, because these creepy cups disappear fast!
Key Ingredients & Substitutions
Oreo Cookies: These give the “dirt” texture and chocolate flavor. If you want gluten-free, try gluten-free chocolate sandwich cookies. You can also use crushed chocolate graham crackers for a lighter crunch.
Cream Cheese: This adds richness and a slight tang to balance the sweetness. If you want it lighter, you can swap for mascarpone or whipped cream cheese spread, but it won’t be quite as thick.
Heavy Whipping Cream: It’s important for making fluffy layers. For a dairy-free option, try full-fat coconut cream whipped until stiff—it makes a nice substitute with a subtle coconut flavor.
Chocolate Pudding Mix: Instant pudding is quick and thickens nicely. If unavailable, you can make homemade pudding, but it needs time to set. You can also use vanilla pudding and add cocoa powder for chocolate flavor.
Halloween-themed Candy and Decorations: These bring the fun spooky vibe. Use gummy worms and cookie or fondant tombstones like in the picture. If unavailable, simple gummies or chocolate chips work too.
How Do I Layer the Dirt Cups Without Making a Mess?
Layering the dirt cups nicely makes them look extra special for Halloween. Here’s how I keep it clean and clear:
- Use clear cups or jars so you can see the yummy layers, and it’s fun to watch the ‘dirt’ stack up.
- Spoon carefully – I use a small spoon or piping bag to add the cream cheese and pudding layers smoothly over the cookie crumbs.
- Pat layers gently but don’t press too hard, or you’ll mash the dirt texture.
- Drizzle chocolate syrup sparingly between layers for flavor and visual interest, adding contrasting textures.
- Chill before adding toppings so the layers set well and your gummy worms and tombstones won’t sink.
Taking your time with layering helps the dessert look beautiful and keeps the fun spooky scene intact until serve time.
Equipment You’ll Need
- Food processor – crushes cookies quickly to make that perfect dirt texture.
- Mixing bowls – at least two, so you can keep pudding and cream cheese mixtures separate.
- Electric mixer or hand mixer – whips the heavy cream and cream cheese smooth and fluffy.
- Spoons or small spatulas – for folding mixtures gently without losing fluffiness.
- Clear serving cups or jars – shows off your spooky layered dirt cups beautifully.
- Measuring cups and spoons – to keep your layers balanced and tasty.
Flavor Variations & Add-Ins
- Use peanut butter pudding instead of chocolate for a nutty twist that pairs well with the cookie dirt.
- Add crushed candy corn or mini candy pumpkins between layers for extra Halloween flair and crunch.
- Stir in a spoonful of instant coffee powder to the pudding for a mocha flavor that adults will love.
- Top with shredded coconut dyed green for “grass” around your graveyard scene for a fun color pop.
Halloween Graveyard Dirt Cups
Ingredients You’ll Need:
For the Dirt:
- 24 Oreo cookies (or any chocolate sandwich cookies)
For the Cream Cheese Mixture:
- 1 (8 oz) package cream cheese, softened
- 2 cups powdered sugar
- ½ cup heavy whipping cream (from the 2 cups divided)
For the Whipped Cream and Pudding Layers:
- 1.5 cups heavy whipping cream (remaining from 2 cups divided)
- 1 (3.9 oz) package instant chocolate pudding mix
- 2 cups cold milk
- Chocolate syrup, for drizzling
For Decorating:
- Gummy worms or Halloween-themed candy (ghosts, tombstones, flowers)
- Optional: edible decorations like small fondant tombstones, candy flowers, or sprinkles
How Much Time Will You Need?
This recipe takes about 20 minutes to prepare and assemble. Then, the cups should chill in the refrigerator for at least 2 hours to set properly and allow the flavors to meld. Chilling overnight works great if you want to make them ahead of time.
Step-by-Step Instructions:
1. Prepare the Cookie Dirt:
Place the Oreo cookies into a food processor and pulse until they form fine crumbs resembling dirt. Set aside about 1 cup of these crumbs for the topping and use the rest to create the base layer in your cups.
2. Make the Cream Cheese Mixture:
In a mixing bowl, beat the softened cream cheese until smooth. Gradually add the powdered sugar and ½ cup of heavy whipping cream, beating until the mixture becomes creamy and fluffy. Set this mixture aside.
3. Whip the Cream:
In a separate bowl, whip the remaining 1.5 cups of heavy whipping cream until stiff peaks form. Gently fold half of this whipped cream into the cream cheese mixture to lighten it.
4. Prepare the Chocolate Pudding:
In another bowl, whisk the instant chocolate pudding mix with cold milk until thickened, which usually takes about 2 minutes. Then fold the remaining whipped cream into the pudding until smooth and combined.
5. Assemble the Dirt Cups:
- Start with a layer of crushed cookie crumbs at the bottom of each cup.
- Add a layer of the cream cheese whipped cream mixture over the crumbs.
- Drizzle a little chocolate syrup over this cream layer for extra flavor.
- Add a layer of the chocolate pudding whipped cream mixture.
- Repeat layering if desired and finish with a top layer of cookie crumbs to look like dirt.
6. Decorate and Chill:
Garnish each cup with your favorite Halloween decorations, such as gummy worms, small fondant tombstones, or candy flowers. Refrigerate for at least 2 hours to allow the dessert to set and the flavors to blend.
7. Serve and Enjoy:
Serve your spooky Halloween Graveyard Dirt Cups chilled, and enjoy the fun layers and creepy decorations with family and friends!
Can I Use Regular Chocolate Sandwich Cookies Instead of Oreos?
Yes! Any chocolate sandwich cookies work well to create the “dirt” texture. Just be sure to crush them finely for the best effect.
How Long Can I Store These Dirt Cups?
Store them covered in the refrigerator for up to 3 days. The layers will stay fresh, but toppings like gummy worms might soften over time.
Can I Make These Ahead of Time?
Absolutely! Prepare and assemble the cups the day before your event and chill overnight. Add gummy worms and decorations just before serving for the freshest look.
What If I Don’t Have a Food Processor to Crush Cookies?
No worries! Place the cookies in a sealed plastic bag and crush them with a rolling pin until fine crumbs form—just like dirt!