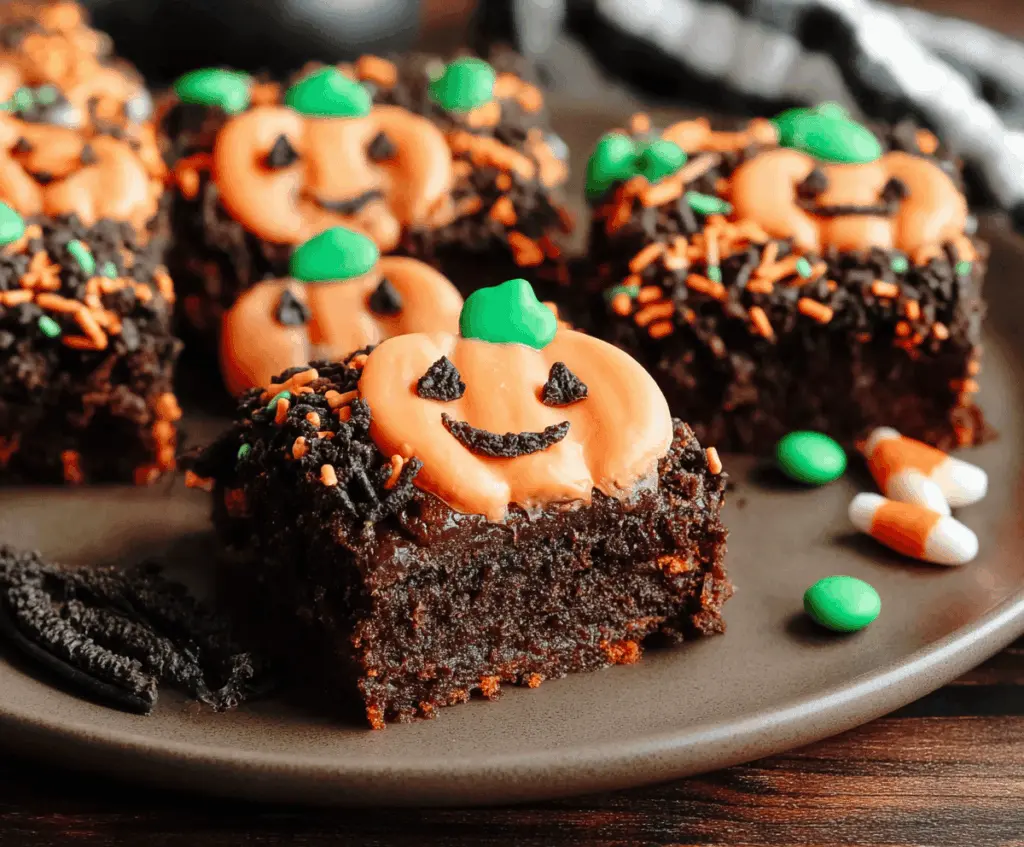
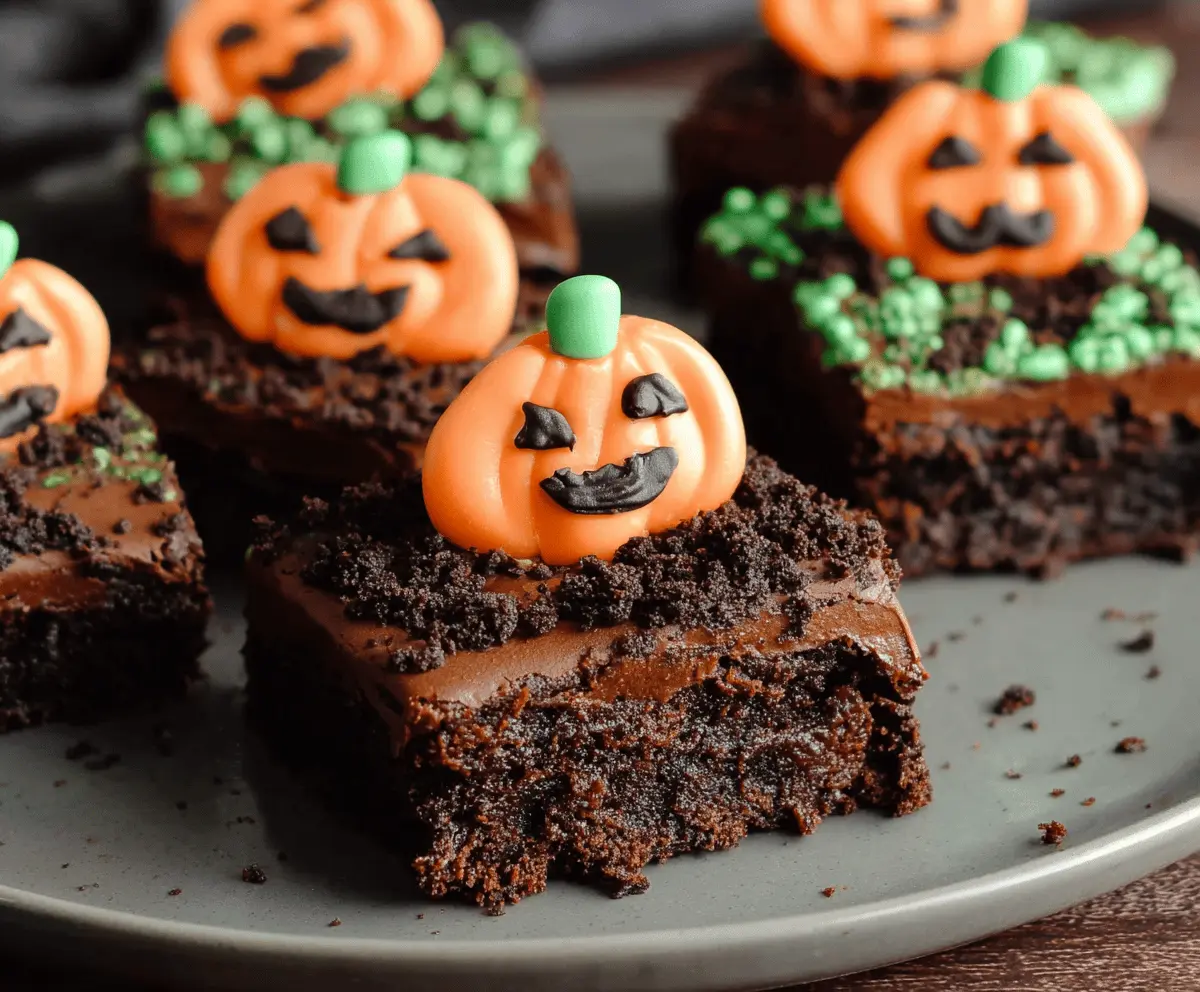
Halloween Pumpkin Patch Brownies
Halloween Pumpkin Patch Brownies are a fun and festive treat that combines rich, fudgy chocolate brownies with cute pumpkin decorations to celebrate the spooky season. These brownies have a deep…
Tip: save now, cook later.Halloween Pumpkin Patch Brownies are a fun and festive treat that combines rich, fudgy chocolate brownies with cute pumpkin decorations to celebrate the spooky season. These brownies have a deep chocolate flavor and a moist, chewy texture that makes them a perfect base for all your Halloween creativity.
I love making these brownies because they’re so easy to customize with pumpkin candies or orange frosting to create a little pumpkin patch right on your dessert plate. It’s a fun way to get everyone excited about Halloween baking, and the bright colors make these brownies look extra special without a lot of effort.
My favorite way to serve them is at a neighborhood party or family gathering where kids and grown-ups alike enjoy grabbing a brownie and marveling at the pumpkin designs. They’re also great for school events or just a spooky treat at home, and they always bring out smiles and a bit of Halloween magic.
Key Ingredients & Substitutions
Butter: Unsalted butter gives the brownies a rich, creamy texture. If you prefer, you can swap it for coconut oil for a dairy-free option.
Cocoa Powder: Using unsweetened cocoa powder is key for a deep chocolate flavor. Dutch-processed cocoa works too and makes the brownies a bit smoother.
Chocolate Chips: Chocolate chunks or chips add extra gooeyness inside. Dark or semi-sweet chocolate is my favorite but milk chocolate works if you like sweeter brownies.
Frosting & Candy Melts: The orange and green frosting or candy melts create the festive pumpkin look. You can use store-bought icing, or try homemade buttercream for more control over flavor and texture.
How Do You Get Fudgy Brownies That Don’t Overbake?
Baking brownies just right is key to fudgy texture. Here’s my simple guide:
- Don’t overmix: Stir dry ingredients until just combined to keep brownies tender.
- Watch the bake time: Check at 20 minutes – insert a toothpick. If it comes out with moist crumbs, stop baking.
- Cool completely: Let brownies cool in the pan to set before decorating. Warm brownies might crumble or melt frosting.
These tips will help you get soft, moist brownies perfect for the festive pumpkin decorations on top!
Equipment You’ll Need
- 8×8-inch baking pan – perfect size for brownies and easy to get even baking.
- Mixing bowls – have one for wet and one for dry ingredients to keep things simple.
- Whisk or spoon – great for mixing batter without overworking it.
- Microwave-safe bowl – melts butter quickly and safely.
- Piping bags or zip-top bags – useful for decorating pumpkins with frosting or candy melts.
- Toothpicks or small food-safe tools – handy for drawing pumpkin faces with black gel or chocolate.
- Wire rack – lets brownies cool evenly and prevents sogginess.
Flavor Variations & Add-Ins
- Add chopped nuts like walnuts or pecans for extra crunch and a nutty flavor contrast.
- Mix in a teaspoon of cinnamon or pumpkin pie spice for a warm fall twist that pairs well with pumpkin decorations.
- Use white chocolate chips instead of dark for a sweeter, creamier bite and contrast with the cocoa brownies.
- Try swapping the chocolate chips for orange-flavored candies to boost the Halloween theme with extra color and zest.
Halloween Pumpkin Patch Brownies
Ingredients You’ll Need:
For the Brownies:
- 1/2 cup (115g) unsalted butter
- 1 cup (200g) granulated sugar
- 2 large eggs
- 1 teaspoon vanilla extract
- 1/3 cup (35g) unsweetened cocoa powder
- 1/2 cup (65g) all-purpose flour
- 1/4 teaspoon salt
- 1/4 teaspoon baking powder
- 1 cup (175g) chocolate chips or chunks
For the Decorations:
- Black and orange sprinkles (for “dirt” effect)
- Orange frosting or orange candy melts (for pumpkin faces)
- Green frosting or green candy melts (for pumpkin stems)
- Black food coloring gel or melted dark chocolate (for pumpkin face details)
How Much Time Will You Need?
You’ll spend about 10 minutes preparing the batter, 20-25 minutes baking time, and then about 30 minutes cooling and decorating the brownies. Total time is roughly 1 hour.
Step-by-Step Instructions:
1. Prepare and Bake the Brownies:
Preheat your oven to 350°F (175°C). Grease an 8×8-inch baking pan or line it with parchment paper. Melt the butter in a microwave-safe bowl and allow it to cool slightly. Stir in the sugar, eggs, and vanilla extract until smooth. In a separate bowl, whisk together the cocoa powder, flour, salt, and baking powder. Gradually add the dry ingredients to the wet mixture, mixing just until combined. Fold in the chocolate chips. Pour this batter into the prepared pan and spread evenly. Bake for 20-25 minutes or until a toothpick inserted in the center comes out with a few moist crumbs.
2. Cool and Cut:
Allow the brownies to cool completely in the pan on a wire rack. Once cool, cut them into squares for decorating.
3. Decorate Your Pumpkin Patch:
Sprinkle the edges of each brownie with black and orange sprinkles to create a “dirt” effect. Prepare your orange frosting or melt orange candy melts and pipe pumpkin shapes onto the top center of each brownie square. Add a small dollop of green frosting or candy melts at the top of each pumpkin to make the stem. Using black food coloring gel or melted dark chocolate, carefully pipe little pumpkin faces with eyes and smiles. Let the decorations set before serving.
Can I Use Store-Bought Brownie Mix Instead of Making from Scratch?
Yes, you can use a boxed brownie mix to save time! Just bake according to the package instructions, then decorate with the pumpkin frosting and sprinkles as directed.
How Should I Store Leftover Pumpkin Patch Brownies?
Store leftovers in an airtight container at room temperature for up to 3 days. If your house is warm, refrigerate to keep the frosting from melting, then bring to room temperature before serving.
Can I Make These Brownies Ahead of Time?
Absolutely! Bake and cool the brownies a day in advance. Decorate just before serving to keep the frosting fresh and vibrant.
What Can I Use If I Don’t Have Candy Melts for Decorating?
No problem! Use colored frosting or even regular chocolate tinted with food coloring. You can also pipe pumpkin shapes with tinted buttercream for a homemade touch.