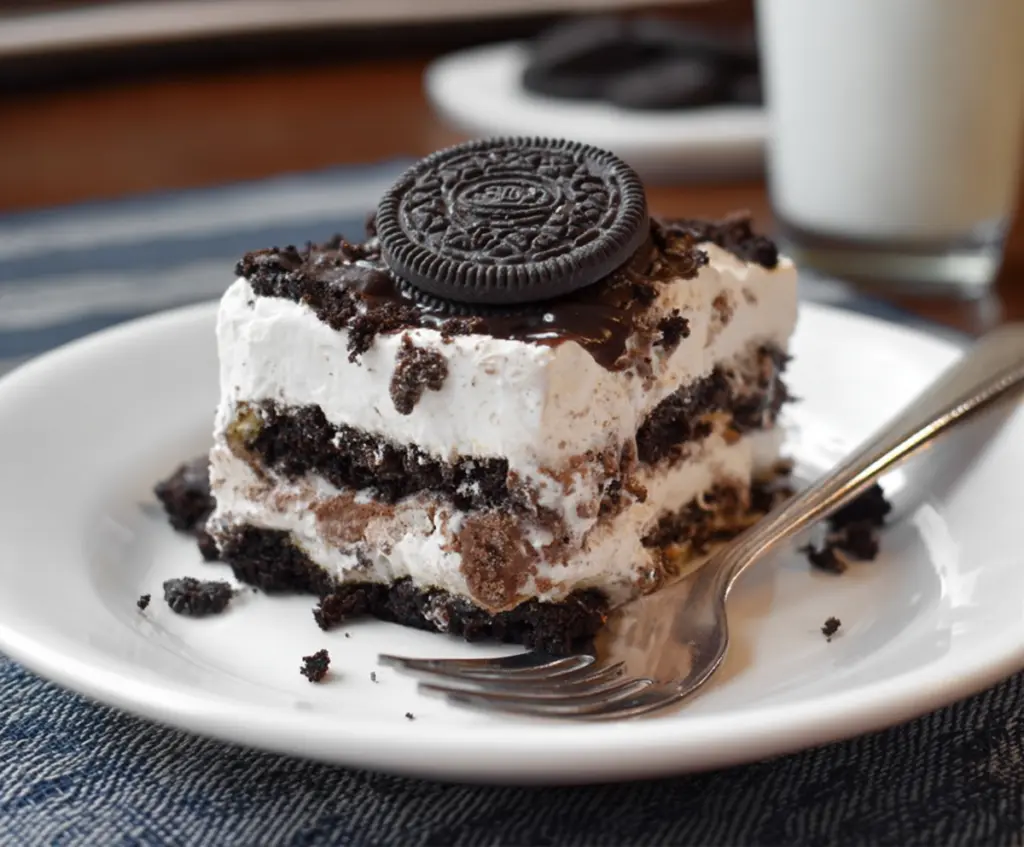
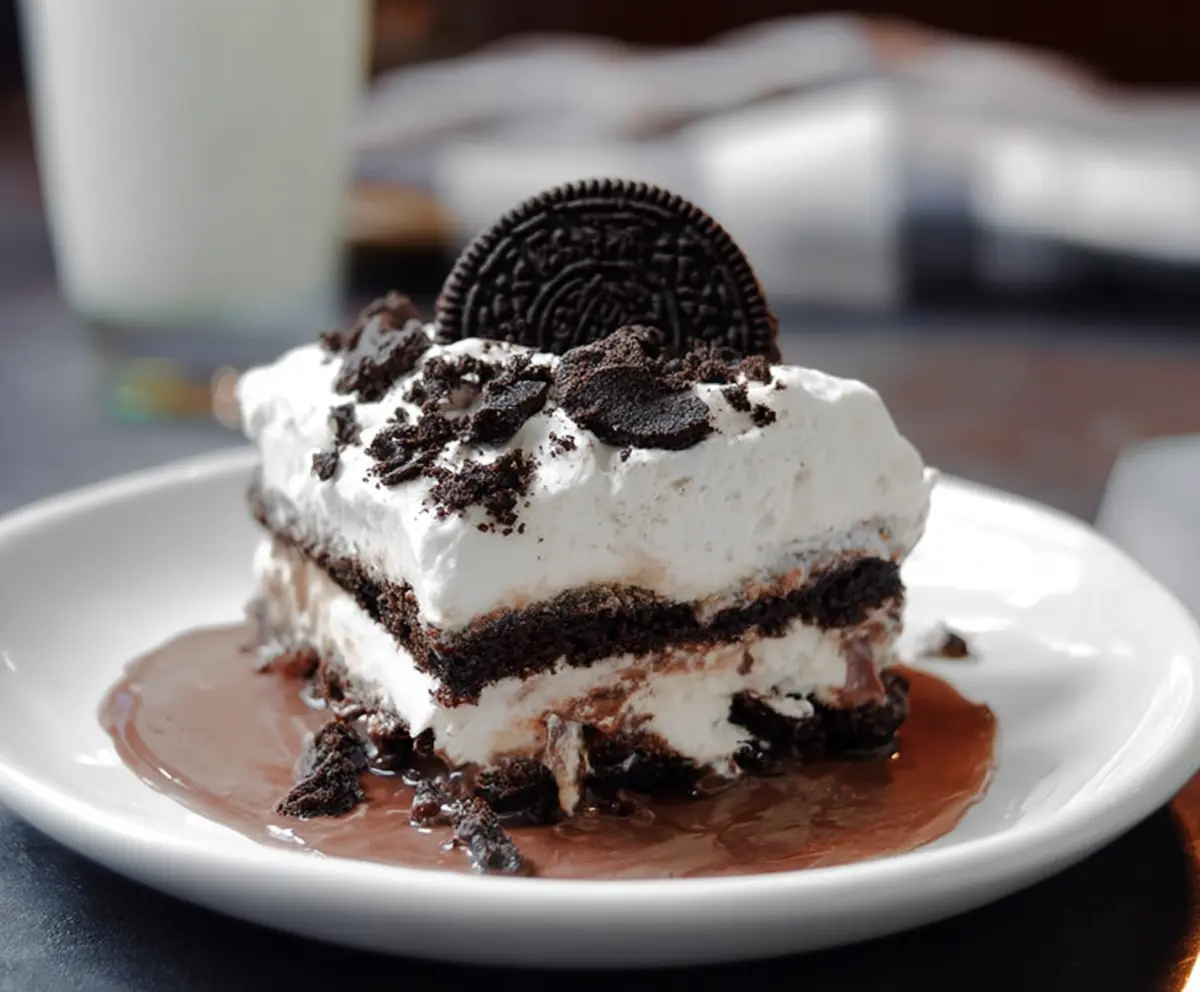
No Bake Oreo Icebox Cake
No Bake Oreo Icebox Cake is a fun and easy dessert that layers creamy whipped filling with crunchy Oreo cookies. It’s simple to put together since you don’t need the…
Tip: save now, cook later.No Bake Oreo Icebox Cake is a fun and easy dessert that layers creamy whipped filling with crunchy Oreo cookies. It’s simple to put together since you don’t need the oven, and the cookies get nice and soft as they chill in the fridge, making each bite a perfect mix of textures.
I love making this cake because it’s a crowd-pleaser and perfect for last-minute gatherings. The best part is that you can customize it with extra chocolate chips or a drizzle of chocolate syrup on top. Plus, it’s so satisfying to watch the cookies soften overnight and turn into a delicious, cake-like treat in the morning.
When I serve this Oreo Icebox Cake, I like to cut it into small squares and enjoy it with a glass of cold milk or a cup of coffee. It’s a simple dessert that brings a lot of smiles, and I always find it’s gone faster than I expect. It’s the perfect sweet finish to any casual meal or a treat to share with friends and family.
Key Ingredients & Substitutions
Oreo Cookies: These are the star of the cake and give it that classic crunch and chocolate flavor. If you’re out of Oreos, chocolate sandwich cookies or chocolate wafers work well too.
Heavy Whipping Cream: You need cold cream to whip it properly and get those fluffy peaks. You can substitute with canned coconut cream for a dairy-free version.
Cream Cheese: This gives the filling a tangy richness and helps it set. If you want to skip it, use mascarpone or Greek yogurt for a lighter twist, but the texture may be less firm.
Sweetened Condensed Milk: This adds sweetness and creaminess without needing extra sugar. You can try evaporated milk mixed with sugar if you don’t have condensed milk, but the taste will be less sweet.
How Do You Make the Creamy Filling Light and Fluffy?
Getting a light, fluffy filling is key to this cake’s creaminess. Here’s how I do it:
- Start by whipping the cold heavy cream with sugar and vanilla until it holds soft peaks. Cold cream whips better!
- Beat the softened cream cheese separately until smooth so there are no lumps.
- Slowly mix in the sweetened condensed milk into the cream cheese for a smooth, sweet base.
- Gently fold the whipped cream into the cream cheese mix. Folding means mixing carefully to keep the airy texture, not stirring hard.
Doing these steps right ensures your filling is light but stable enough to hold the Oreo layers without collapsing.
Why Is Chilling the Cake Important?
The chilling step lets the crushed Oreos soak up moisture from the cream filling. This softens the cookies, turning them almost cake-like in texture. I recommend covering the dish tightly so it doesn’t dry out in the fridge.
Chilling overnight is best, but 6 hours works if you’re in a hurry. The longer it chills, the better the layers meld and taste!
Equipment You’ll Need
- 9×9 inch baking dish or pan – perfect size to layer the Oreos and cream evenly.
- Mixing bowls – one for whipping cream and another for mixing cream cheese and condensed milk.
- Electric mixer or hand whisk – makes whipping cream quick and easy, plus smooths out the cream cheese mixture.
- Spatula – great for folding whipped cream gently into the cream cheese mixture without deflating it.
- Measuring cups and spoons – for accurate ingredient amounts to get the best texture and taste.
Flavor Variations & Add-Ins
- Add a layer of sliced strawberries or bananas in between for a fresh fruity twist.
- Mix in a tablespoon of instant coffee powder into the cream for a mocha-flavored cake.
- Swap Oreos for peppermint chocolate cookies around the holidays for a festive touch.
- Stir in mini chocolate chips or crushed nuts into the cream for extra crunch and texture.
No Bake Oreo Icebox Cake
Ingredients You’ll Need:
For The Cake:
- 36 Oreo cookies (about 3 cups crushed)
- 2 cups heavy whipping cream, cold
- 1/4 cup granulated sugar
- 1 tsp vanilla extract
- 8 oz cream cheese, softened
- 14 oz sweetened condensed milk
- 1/4 cup unsweetened cocoa powder (optional for chocolate flavor)
- Chocolate sauce or syrup for topping (optional)
- Whole Oreo cookies for garnish (optional)
How Much Time Will You Need?
The prep time for this recipe is about 20 minutes, mainly for crushing cookies and mixing cream layers. After assembling, the cake needs at least 6 hours in the fridge—overnight chilling is best—to let the Oreos soften and the flavors blend perfectly.
Step-by-Step Instructions:
1. Prepare the Oreo Base and Layers:
Crush about 30 Oreo cookies into small pieces, keeping 6 whole Oreos aside for decoration. Put the crushed cookies to one side.
2. Make the Whipped Cream Mixture:
In a large bowl, whip the cold heavy cream with the granulated sugar and vanilla extract until soft peaks form—this means the cream holds shape but is still smooth and creamy.
3. Prepare the Cream Cheese Mixture:
In another bowl, beat the softened cream cheese until smooth. Slowly add the sweetened condensed milk and mix thoroughly. For a chocolate twist, stir in the cocoa powder now.
4. Combine the Mixtures:
Gently fold the whipped cream into the cream cheese mixture, mixing carefully to keep it light and fluffy.
5. Assemble the Cake:
In a 9×9 inch dish, spread a thin layer of the cream mixture at the bottom. Sprinkle a layer of crushed Oreos over it, then add another layer of cream mixture. Repeat layering until all cream and Oreos are used, finishing with cream on top.
6. Top and Garnish:
Drizzle chocolate sauce or syrup over the top cream and decorate with whole Oreo cookies if you like.
7. Chill:
Cover the dish with plastic wrap and refrigerate for at least 6 hours or overnight. This step helps the Oreos soften and the flavors mingle beautifully.
8. Serve:
Cut into squares and serve chilled. Enjoy your creamy, delicious no-bake Oreo icebox cake!
Can I Use Frozen Whipping Cream for This Recipe?
It’s best to use fresh, cold heavy whipping cream straight from the fridge. Frozen cream doesn’t whip well and may result in a less fluffy texture.
How Long Can I Store Leftovers?
Store leftover cake covered in the fridge for up to 3 days. Keep it chilled to maintain the creamy texture and prevent the cookies from getting too soggy.
Can I Substitute the Cream Cheese?
Yes! Mascarpone or Greek yogurt can be used instead of cream cheese, but the texture will be slightly different and less firm.
Is It Okay to Use Different Cookies?
Absolutely. Chocolate sandwich cookies or chocolate wafers are great alternatives, just make sure to use something that complements the creamy layers well.