Red Velvet Whoopie Pies
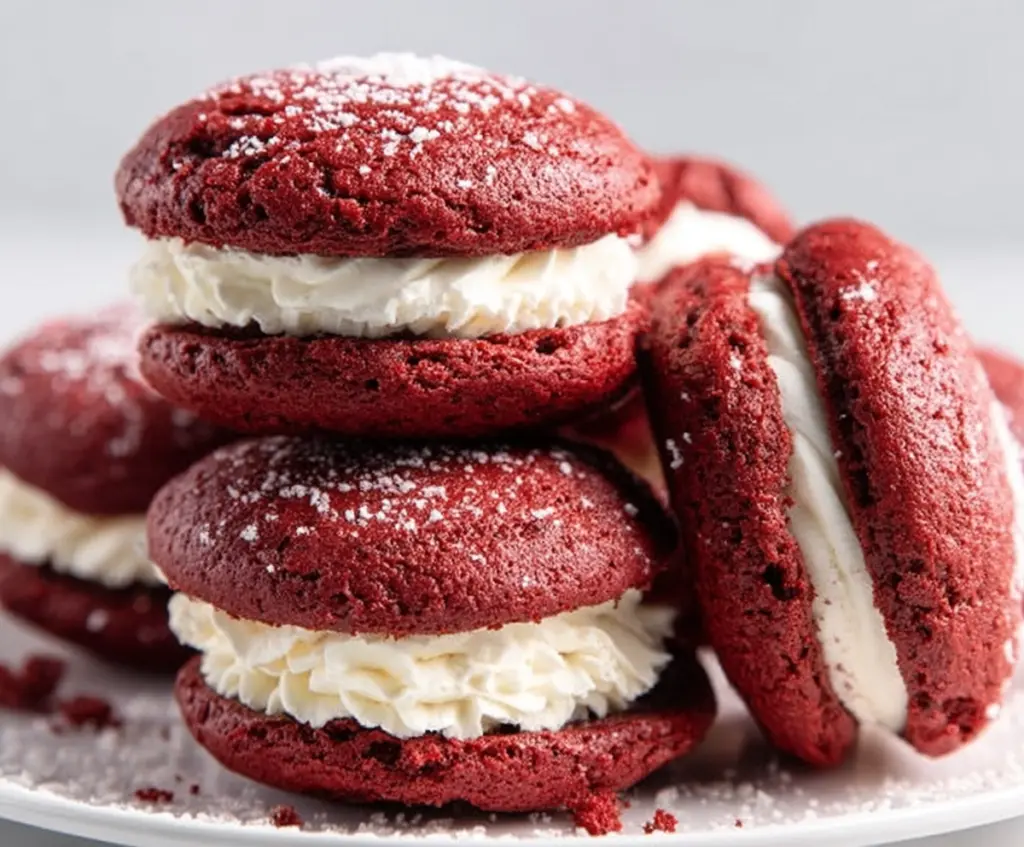
Red Velvet Whoopie Pies are little treats that catch your eye with their rich red color and fluffy, cake-like texture. These soft, tender cakes sandwich a creamy, sweet filling that…
Tip: save now, cook later.Red Velvet Whoopie Pies are little treats that catch your eye with their rich red color and fluffy, cake-like texture. These soft, tender cakes sandwich a creamy, sweet filling that perfectly balances the cocoa flavor with a hint of vanilla. They’re a playful twist on classic cookies, but way softer and more fun to hold.
I love making these because they bring back memories of cozy kitchens and family gatherings. The colors always make people smile, and the creamy center is the best part—you can’t help but sneak a bite before assembling the whole thing! If you’re like me, you’ll appreciate how simple they are to make but feel special enough for any occasion.
My favorite way to enjoy Red Velvet Whoopie Pies is fresh out of the fridge with a cold glass of milk or a cup of tea. They’re just the right size for a quick treat or sharing with friends. Plus, they’re great for packing in lunchboxes or bringing along to parties. Trust me, once you try them, these little pies will become a staple in your dessert rotation.
Key Ingredients & Substitutions
Flour: All-purpose flour works great for a soft, tender cake. You can swap with gluten-free flour blends if needed—just check if they include xanthan gum for structure.
Cocoa powder: Unsweetened cocoa gives that slight chocolate touch. Dutch-processed cocoa is an option, but reduce baking soda slightly since it reacts differently.
Buttermilk: This adds moisture and tang. If you don’t have it, mix 1 cup milk with 1 tablespoon lemon juice or vinegar and let sit for 5 minutes—easy and effective.
Red food coloring: Traditional for red velvet’s color! If you prefer natural options, beet juice or powder works, but the color may be softer.
Cream cheese filling: Cream cheese and butter create a smooth, rich filling. For a lighter version, try using part cream cheese and part whipped cream or mascarpone.
How Do You Get the Perfect Soft and Fluffy Whoopie Pie Cakes?
Getting that light, cakey texture requires gentle mixing and correct baking time:
- Beat butter and sugar well until fluffy—this traps air for a soft cake.
- Add dry and wet ingredients alternately, mixing just enough to combine to avoid toughness.
- Use room temperature ingredients so they blend smoothly.
- Drop batter evenly sized for uniform baking; a cookie scoop helps.
- Bake just until edges are set and toothpick comes out clean—don’t overbake or they dry out.
- Cool completely before adding filling to prevent melting or slipping.
Equipment You’ll Need
- Baking sheets – perfect for baking the whoopie pie cakes evenly and with plenty of space.
- Parchment paper or silicone baking mats – stop the cakes from sticking and make cleanup easy.
- Electric mixer – makes creaming butter and sugar quick and smooth for light cakes.
- Mixing bowls – you’ll need several for dry ingredients, wet ingredients, and the filling.
- Piping bag with star tip (optional) – gives the cream cheese filling a pretty, consistent swirl.
- Wire cooling racks – cool your cakes evenly and prevent sogginess on the bottom.
Flavor Variations & Add-Ins
- Swap red velvet for chocolate whoopie pies using cocoa powder only for a richer taste.
- Add a pinch of cinnamon or espresso powder to the batter for subtle warmth and depth.
- Mix mini chocolate chips into the batter for a fun surprise in each bite.
- Try a marshmallow or vanilla buttercream filling instead of cream cheese for a sweeter, fluffier center.
Red Velvet Whoopie Pies
Ingredients You’ll Need:
For the Red Velvet Cakes:
- 2 1/2 cups all-purpose flour
- 1 1/2 teaspoons baking powder
- 1/2 teaspoon baking soda
- 1/2 teaspoon salt
- 2 tablespoons unsweetened cocoa powder
- 1 cup (2 sticks) unsalted butter, softened
- 1 cup granulated sugar
- 1 large egg
- 1 teaspoon vanilla extract
- 1 cup buttermilk
- 1 to 2 tablespoons red food coloring (adjust for desired color)
- 1 teaspoon white vinegar
For the Cream Cheese Filling:
- 8 oz cream cheese, softened
- 1/2 cup (1 stick) unsalted butter, softened
- 3 1/2 cups powdered sugar, sifted
- 1 teaspoon vanilla extract
How Much Time Will You Need?
Preparing these tasty Red Velvet Whoopie Pies takes about 15 minutes to prep, 10-12 minutes to bake, and another 10-15 minutes to cool. Assembling and filling them takes around 10 more minutes. So plan for approximately 45 minutes total, plus any chilling time if you want them chilled before serving.
Step-by-Step Instructions:
1. Prepare the Red Velvet Cake Batter:
Start by preheating your oven to 350°F (177°C) and lining two baking sheets with parchment paper or silicone mats. In a medium bowl, whisk together the flour, baking powder, baking soda, salt, and cocoa powder until well mixed. In a large bowl, beat the softened butter and sugar using an electric mixer on medium speed for 3-4 minutes until the mixture is light and fluffy. Add the egg and vanilla extract, beating well until smooth. In a separate small bowl, mix the buttermilk, red food coloring, and vinegar. Alternately add the dry ingredients and wet mixture to the butter mixture in three parts, beginning and ending with the dry ingredients. Mix on low speed just until everything is combined—try not to overmix!
2. Bake the Cakes:
Use a tablespoon or cookie scoop to drop rounded portions of batter 2 inches apart on the prepared baking sheets. If needed, gently spread the batter into 2 to 2.5-inch circles. Bake for 10-12 minutes or until the edges are firm and a toothpick inserted in the center comes out clean. Let the cakes cool on the sheets for about 5 minutes before transferring them to wire racks to cool completely.
3. Prepare the Cream Cheese Filling:
In a large bowl, beat the softened cream cheese and butter together on medium speed until smooth and creamy. Gradually add the sifted powdered sugar, about 1 cup at a time, mixing on low speed to avoid a sugar cloud. Once all sugar is mixed in, add the vanilla extract and beat on medium-high speed until the filling is nice and fluffy.
4. Assemble the Whoopie Pies:
Once the cakes are completely cool, pair them up by size. Use a piping bag fitted with a star tip, or simply a spoon, to spread a generous amount of the cream cheese filling onto the flat side of one cake. Top with its matching cake and gently press together so the filling spreads evenly to the edges.
5. Serve and Store:
If you like, sprinkle a little powdered sugar over the top for a pretty finish. Serve the pies immediately, or store them in an airtight container in the refrigerator for up to 3 days. They taste great chilled or brought back to room temperature before enjoying.
Can I Use Frozen Cream Cheese for the Filling?
It’s best to use cream cheese that’s fully thawed and softened for a smooth filling. To thaw quickly, place the cream cheese in the microwave on a low power setting in short bursts, or leave it in the fridge overnight.
Can I Make Red Velvet Whoopie Pies Ahead of Time?
Absolutely! You can bake the cakes and prepare the filling up to 2 days in advance. Store the cakes and filling separately in airtight containers in the fridge and assemble just before serving for the freshest texture.
How Should I Store Leftover Whoopie Pies?
Store leftovers in an airtight container in the refrigerator to keep the filling fresh. They’ll last about 3 days. Bring them to room temperature or enjoy them chilled based on your preference before serving.
What Can I Use Instead of Buttermilk?
If you don’t have buttermilk, mix 1 cup of milk with 1 tablespoon of lemon juice or white vinegar and let sit for 5 minutes. This homemade substitute works perfectly in the red velvet cake batter.