
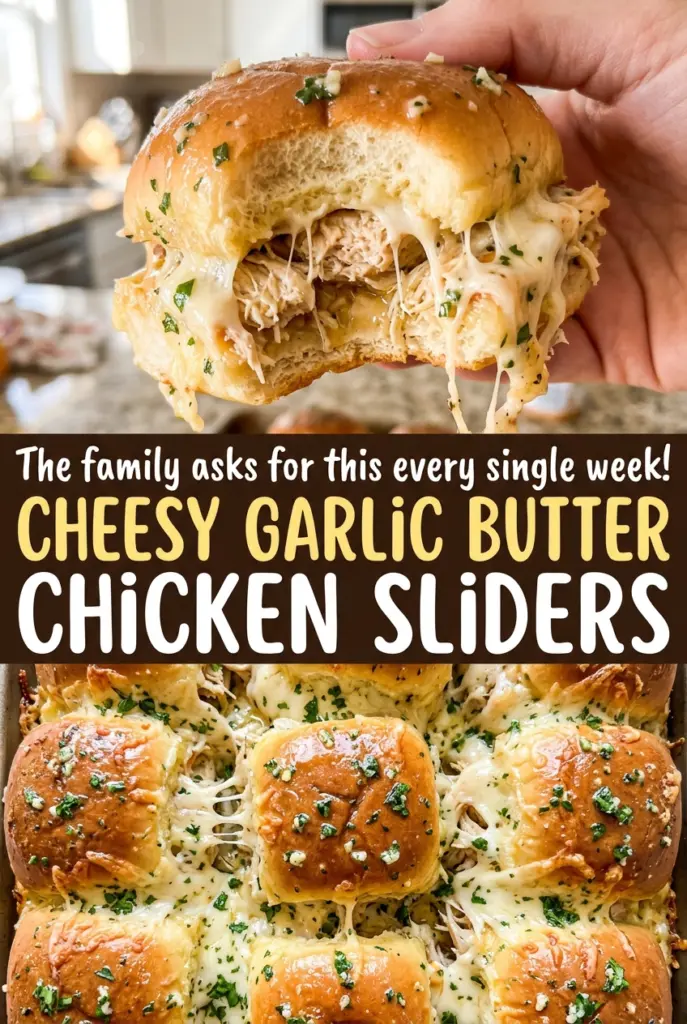
Cheesy Garlic Butter Chicken Sliders
When the foil comes off, the rolls should be soft and the cheese well on its way to melting; those last minutes give the tops their color. I like this…
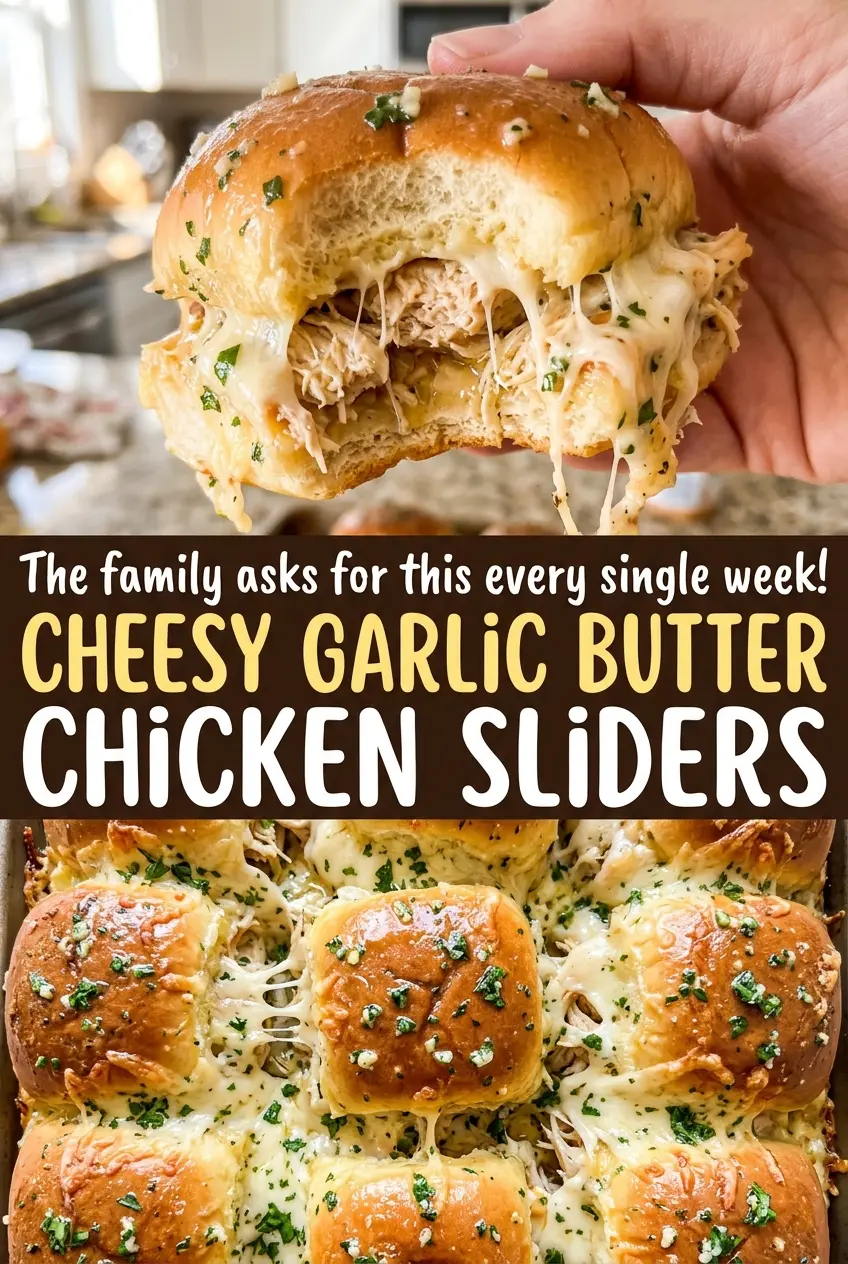
Tip: save now, cook later.When the foil comes off, the rolls should be soft and the cheese well on its way to melting; those last minutes give the tops their color. I like this approach for cheesy garlic butter chicken sliders because the covered bake heats the filling before the sweet rolls have a chance to brown too much. The chicken is creamy, the provolone makes a proper top-and-bottom layer, and garlic butter settles into the little creases across the rolls.
Keeping the rolls connected while you split them makes assembly quicker and helps the sliders bake as one neat slab. Once they’re out of the oven, a short rest gives the cheese a moment to settle before you cut. The result is tender chicken between stretchy cheese, with a buttery top and just enough sweetness from the rolls.
Kitchen Note
Finely minced garlic distributes through the butter much more evenly than larger pieces. Stir it in as soon as the butter melts, then brush the mixture over the rolls while it’s still easy to spread.
Save these cheesy garlic butter chicken sliders for a game-day spread or an easy shared dinner—the sweet rolls, two cheeses, and garlicky tops make a satisfying pan.
Why the Chicken Gets Cheese on Both Sides, Not Just on Top
Putting provolone under and over the chicken changes how the filling sits in the sandwich. The bottom layer separates the soft rolls from the creamy chicken mixture, while the top layer melts into a lid that helps hold the filling together. You still get cheese in every bite, rather than a topping that slides off when you lift a slider.
The mozzarella has a different job inside the chicken mixture. It melts through the shreds and makes the filling cohesive, while the provolone gives the assembled sliders their distinct cheese layers. Keep the chicken spread in an even blanket instead of building a mound in the middle; an uneven layer leaves the outside sliders short on filling and makes the center harder to heat consistently.
That balance matters with sweet rolls. The chicken mixture is rich and savory, and the bread brings sweetness, so a generous cheese layer doesn’t need an extra sauce or topping to make the sliders feel complete. Each part stays recognizable, but the melted cheeses bring the filling and rolls together.
What the Chicken, Two Cheeses, and Sweet Rolls Each Bring
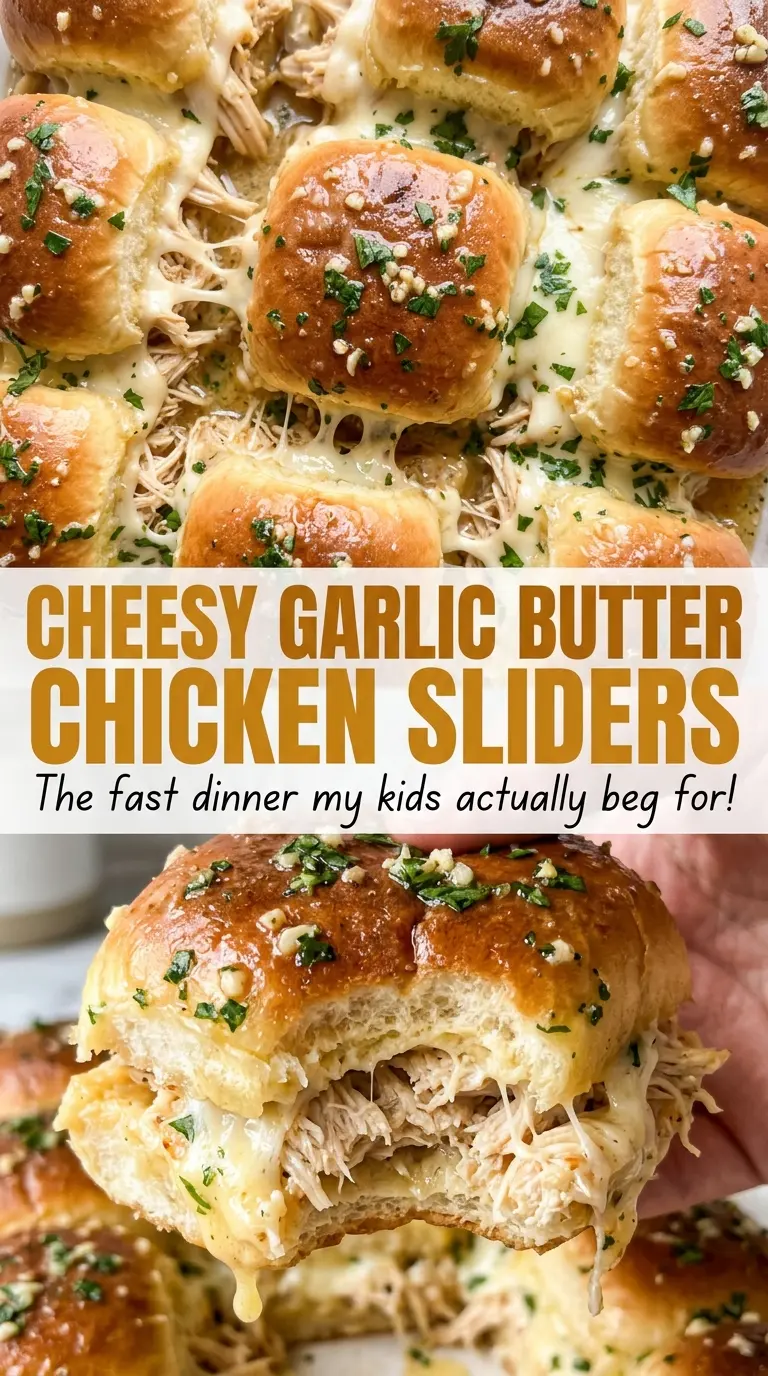
- Cooked shredded rotisserie chicken — Its ready-to-use shreds keep the filling quick to mix and contribute a roasted, savory flavor. Home-cooked shredded chicken works too; use meat that’s moist and pull it into small, even pieces so it mixes easily.
- Mayonnaise — Mayo coats the chicken and gives the filling a creamy texture without making it runny. Regular mayonnaise brings the richest result; reducing it leaves the chicken mixture less cohesive.
- Shredded mozzarella — This melts into the chicken rather than sitting in a separate layer. Pre-shredded cheese is convenient, while cheese shredded from a block usually melts more smoothly.
- Provolone — Its mild, savory taste works well between the sweet rolls and chicken. Choose slices that cover the rolls without leaving large bare gaps; mozzarella can replace it, though the flavor will be milder and the melt stretchier.
- Sweet Hawaiian rolls — Their soft texture and gentle sweetness are part of what makes these sliders distinct. Keep the package’s rolls connected when slicing the slab so the filling is easier to layer evenly.
- Butter, garlic, and parsley — Unsalted butter carries the garlic across the tops, and fresh parsley adds a green, lightly herbal note. Finely mince the garlic so it brushes on with the butter instead of clumping in a few spots.
The Foil-First Bake That Melts the Middle Before Browning the Tops
Mix the filling and prepare the pan
Heat the oven to 350°F and brush a 9×13-inch baking dish with the vegetable oil. Stir the shredded chicken, mayonnaise, mozzarella, onion powder, kosher salt, and black pepper together in a medium bowl. Keep mixing until the seasonings and cheese are distributed through the chicken, rather than leaving pockets of plain meat. The mixture should look creamy and hold together when you scoop it.
Build an even layer inside the rolls
Slice the rolls in half horizontally while keeping them connected, then set the bottom half in the prepared dish. Lay four slices of provolone over the bread, spread the chicken mixture evenly across the cheese, and finish with the remaining provolone. Place the roll tops over everything as one connected sheet. If the chicken is piled higher in the center, level it gently before adding the top layer of cheese.
Brush on the garlic butter and cover
Melt the butter in a small microwave-safe bowl, then stir in the finely minced garlic and chopped parsley. Brush the mixture over the roll tops, working across the whole surface so the edges aren’t left dry. Cover the baking dish tightly with foil before it goes into the oven. A snug cover is important during the first part of baking, when the filling and cheese need time to heat without the tops taking on too much color.
Uncover for color, then rest before cutting
Bake the covered sliders at 350°F for 15 minutes, then remove the foil and bake for another 5–8 minutes. Look for melted cheese and golden tops, and check that the center of the chicken reaches 165°F. If the tops are already deeply golden before the cheese has melted, cover the dish again while it finishes heating. Rest the sliders for 5 minutes before slicing and serving.
Three Ways to Adapt These Chicken Sliders
Use gluten-free sweet rolls
Choose gluten-free sweet rolls in a 12-count package that fit your 9×13-inch dish. Their texture can be more delicate than standard Hawaiian rolls, so slice carefully and avoid pressing down hard when spreading the chicken. The filling and garlic butter stay the same.
Choose less-sweet dinner rolls
Swap in a connected slab of soft dinner rolls if you want the savory chicken and cheese to stand out more than the sweetness of Hawaiian rolls. Pick a package with a similar number and size of rolls so it fits the same dish. The finished sliders will taste less sweet and a little more like a classic baked chicken sandwich.
Bake individual sliders for more browned edges
Separate the rolls before assembling if you prefer more edge and a little less pull-apart softness. Divide the same chicken and cheese layers among the individual roll bottoms, then add the tops and garlic butter. With more sides exposed, watch the color closely as they bake so the edges don’t get too dark.
Storage and Reheating
- Refrigerator: Refrigerate leftovers within 2 hours and eat within 3–4 days. The rolls soften as they sit against the chicken filling.
- Freezer: Freeze cooled sliders wrapped tightly in individual portions for up to 2 months. Thaw overnight in the refrigerator for more even reheating.
- Reheating: Warm covered in a 325°F oven until hot throughout, then uncover briefly if you want to refresh the tops. The microwave is quick, but it makes the bread softer.
Questions That Come Up Before the Sliders Go in the Oven
Cheesy Garlic Butter Chicken Sliders
Ingredients
Equipment
Method
- Heat the oven to 350°F.
- Brush a 9x13-inch baking dish with the vegetable oil.
- Stir together the chicken, mayonnaise, mozzarella, onion powder, salt, and pepper in a medium bowl until evenly combined.
- Slice the rolls in half horizontally, keeping them connected.
- Place the bottom half in the baking dish.
- Layer 4 slices of provolone over the rolls.
- Spread the chicken mixture evenly on top.
- Add the remaining 4 slices of provolone.
- Set the roll tops in place.
- Melt the butter in a small microwave-safe bowl.
- Stir in the garlic and parsley.
- Brush the mixture over the roll tops.
- Cover the dish tightly with foil.
- Bake at 350°F for 15 minutes.
- Uncover and bake for 5–8 minutes, until the cheese is melted, the tops are golden, and the center of the chicken reaches 165°F.
- Rest the sliders for 5 minutes before slicing and serving.