

Christmas Eve Garlic Butter Shrimp Skewers
The shrimp change from gray and translucent to pearly white in just a few minutes under the broiler, so I stay close once the pan goes in. Christmas Eve Garlic…
Tip: save now, cook later.The shrimp change from gray and translucent to pearly white in just a few minutes under the broiler, so I stay close once the pan goes in. Christmas Eve Garlic Butter Shrimp Skewers lean on that quick cook: large shrimp get a light coating of olive oil and paprika, then finish with warm garlic butter, lemon, and parsley. They’re a festive-looking appetizer, but the method is simple enough to keep the kitchen calm.
I pat the shrimp dry before seasoning so the oil and spices cling instead of sliding off a damp surface. The butter gets its own gentle moment on the stove; garlic needs only 30 to 60 seconds to turn fragrant, and browning it can make the finished sauce taste bitter. Spoon that bright, buttery finish over the hot shrimp and serve while they’re tender and glossy.

Kitchen Note
Stay with the garlic while it cooks: 30 to 60 seconds is enough for it to smell fragrant. Take the saucepan off the heat before it picks up color, then stir in the lemon juice and parsley.
Save these Christmas Eve Garlic Butter Shrimp Skewers for a quick, elegant appetizer with tender shrimp and lemony garlic butter.
Why Patting the Shrimp Dry Matters Under the Broiler
A wet shrimp surface works against the quick, direct heat of the broiler. Instead of holding onto the olive oil and seasonings, excess moisture can dilute the coating and create steam around the shrimp. Patting them dry gives the oil, salt, pepper, and paprika a better chance to cling evenly.
That matters here because the shrimp cook fast and the broiler is intense. There isn’t a long cooking window for a wet coating to dry out gradually. I use paper towels until the shrimp feel dry to the touch, then toss them with the seasonings and thread them onto the skewers. This keeps the preparation straightforward and helps each shrimp meet the heat on similar terms. The goal isn’t a crust; it’s juicy, evenly cooked shrimp with seasoning that stays put.
What Each Ingredient Brings to the Garlic Butter Shrimp
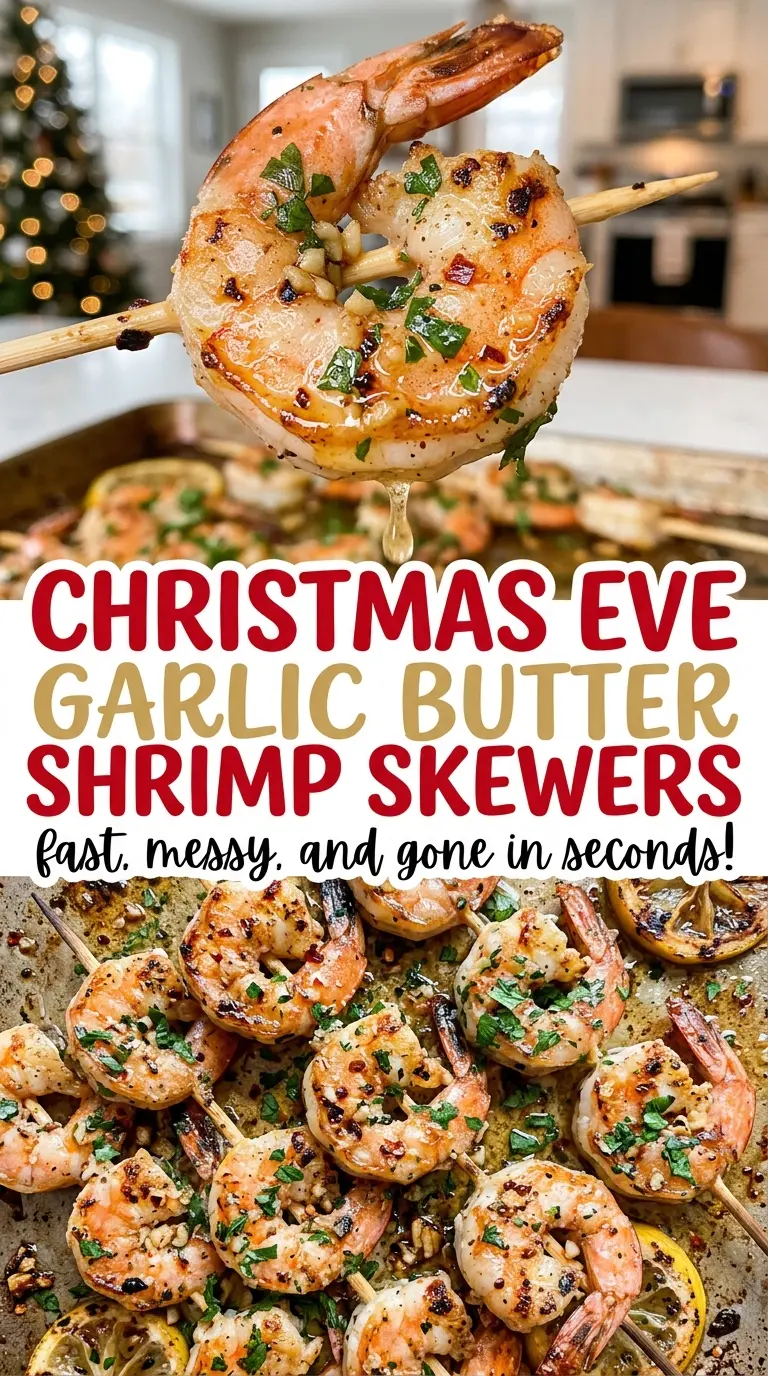
- Large shrimp — The 16–20-per-pound size gives you substantial bites that can be threaded onto skewers and broiled quickly. Peeled and deveined shrimp keep prep manageable; check that the shrimp are dry before seasoning.
- Olive oil and paprika — The oil carries the salt, pepper, and paprika across the shrimp, while paprika adds gentle warmth and color. Use an oil you like the taste of, but there’s no need for a specialty bottle here.
- Unsalted butter — Butter makes the spooned-over finish rich, while unsalted butter lets the shrimp’s kosher salt stay in control. It also gives the garlic and lemon a rounder base than oil alone.
- Garlic — Freshly minced cloves release their aroma quickly in the warm butter. Keep the pieces fairly even so small bits don’t brown before larger ones become fragrant.
- Lemon juice and fresh parsley — Lemon cuts through the buttery richness, and parsley brings a fresh, herbal note at the end. Chopping the parsley before you start the sauce means it’s ready to stir in as soon as the pan comes off the heat.
Getting the Broiler Timing Right for Tender Shrimp
Set Up the Broiler and Pan
Position an oven rack about 6 inches below the broiler and preheat the broiler to high. Line an 18×13-inch rimmed baking sheet with foil so the skewers have a prepared landing spot. Get the pan ready before seasoning the shrimp; once they’re threaded, you’ll want to move directly into cooking rather than leave them waiting. The high broiler heat is what makes the short cooking time work.
Season and Thread the Shrimp
Pat the shrimp dry, then toss them with olive oil, kosher salt, black pepper, and paprika until the coating looks even. Thread the shrimp onto 4 metal skewers, keeping them secure enough to turn halfway through cooking. If the shrimp are still wet, the seasoning can look patchy, so take the extra moment to dry them first. Arrange the skewers on the foil-lined baking sheet.
Make the Garlic Butter Without Browning the Garlic
Melt the unsalted butter in a small saucepan over medium-low heat. Stir in the minced garlic and cook for 30–60 seconds, stopping when it smells fragrant but hasn’t browned. Take the saucepan off the heat, then stir in the lemon juice and chopped parsley. The finished butter should be warm and aromatic, not dark or toasted.
Broil, Turn, and Finish
Broil the shrimp for 4–6 minutes, turning the skewers once halfway through. Watch for the flesh to turn opaque, then check the thickest part of a shrimp for 145°F; thin shrimp can overcook quickly if left under the heat after they’re ready. Transfer the skewers to a serving platter and spoon the garlic butter over the shrimp. The hot surface catches the lemony butter while the centers stay tender.
Easy Ways to Adapt the Skewers for Your Table
Make a Half Batch for Two
Halve each ingredient and thread the shrimp onto two metal skewers instead of four. Keep the broiler position and the same doneness cues; begin checking at the early end of the 4–6 minute window because a smaller batch can finish quickly. The smaller amount gives you the same buttery finish without a platterful of leftovers.
Make It Dairy-Free with Garlic Olive Oil
For a dairy-free finish, replace the unsalted butter with the same amount of olive oil. Warm it over medium-low heat, cook the garlic just until fragrant, then remove it from the heat and stir in the lemon juice and parsley. You’ll lose the creamy richness of butter, but the lemon, herbs, and garlic still make a bright spoon-over sauce.
Storage and Reheating
- Refrigerator: Refrigerate leftovers in a covered container within 2 hours and use them within 3–4 days. The shrimp will be less springy after chilling, and the butter may firm up.
- Freezer: Cooked shrimp can be frozen in an airtight freezer container for up to 2–3 months for best quality. Thaw in the refrigerator; the parsley may darken and the butter may separate slightly.
- Reheating: Warm gently, covered, in short microwave intervals or in a pan over low heat until the leftovers reach 165°F. High heat or prolonged reheating makes shrimp tough, so stop as soon as they’re hot.
Questions That Come Up Before the Skewers Go Under the Broiler
Christmas Eve Garlic Butter Shrimp Skewers
Ingredients
Equipment
Method
- Position an oven rack about 6 inches below the broiler and preheat the broiler to high.
- Line an 18x13-inch rimmed baking sheet with foil.
- Pat the shrimp dry, then toss with the olive oil, salt, pepper, and paprika.
- Thread the shrimp onto 4 metal skewers.
- Melt the butter in a small saucepan over medium-low heat, stir in the garlic, and cook for 30–60 seconds until fragrant but not browned.
- Remove from the heat and stir in the lemon juice and parsley.
- Arrange the skewers on the prepared baking sheet and broil for 4–6 minutes, turning once halfway through, until the shrimp are opaque and reach 145°F in the thickest part.
- Transfer the skewers to a serving platter and spoon the garlic butter over the shrimp.