

Christmas Pistachio Raspberry Thumbprint Cookies
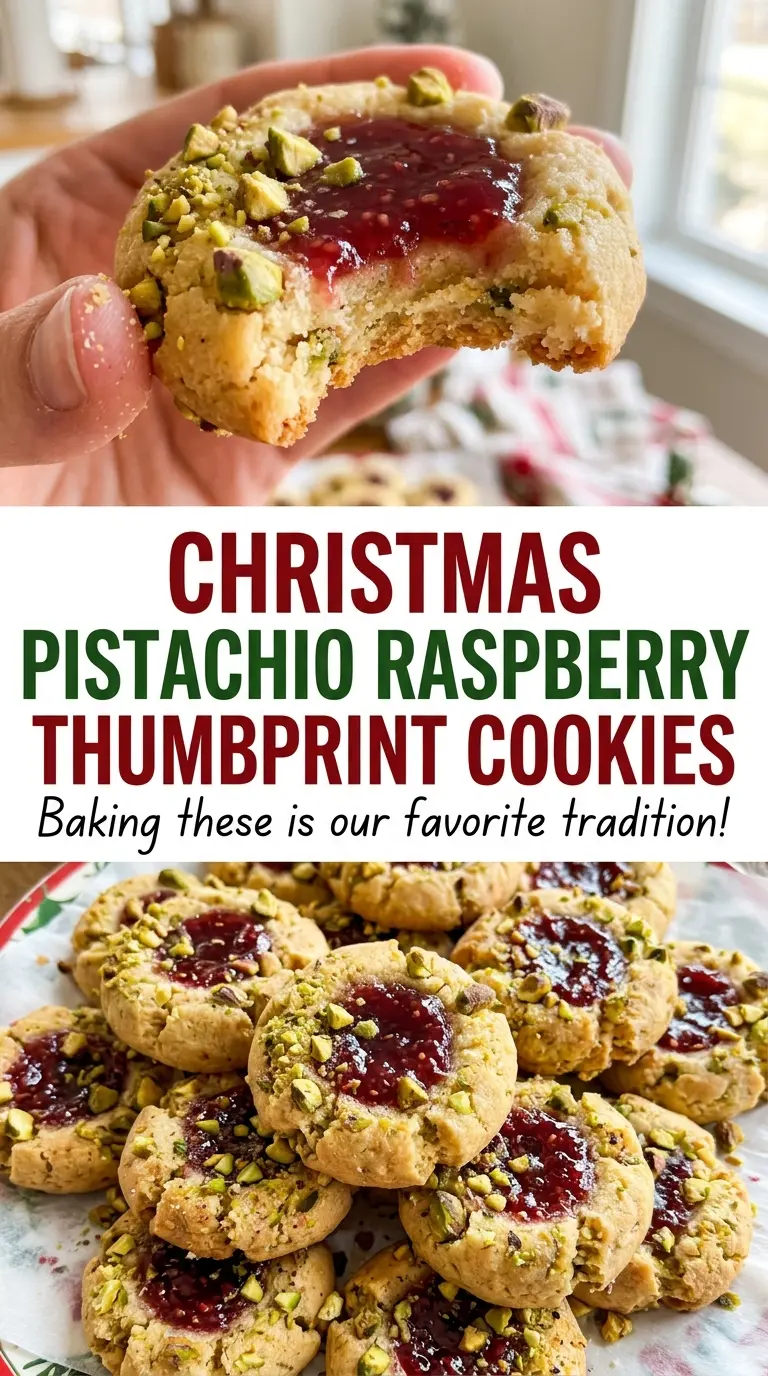
The edges turn pale gold first, while each red jam center stays glossy against its green pistachio coating. That contrast is what I look for when these Christmas Pistachio Raspberry…
Tip: save now, cook later.The edges turn pale gold first, while each red jam center stays glossy against its green pistachio coating. That contrast is what I look for when these Christmas Pistachio Raspberry Thumbprint Cookies come out of the oven. The cookies are buttery and tender, with just enough crunch from the chopped nuts to keep each bite interesting.
I separate the eggs so the yolks can enrich the dough and the whites can help the pistachios cling to the outside. It’s a small bit of prep that gives every cookie a complete coating without adding another ingredient. A short chill firms the dough before shaping, and seedless raspberry jam keeps the centers smooth and bright. The finished cookies are neat enough to share, but still feel like something you’d want to make at home.

Kitchen Note
I get the most even wells with the rounded end of a 1/2-teaspoon measure. Press straight down rather than twisting, so the dough keeps a tidy round edge.
Save these Christmas Pistachio Raspberry Thumbprint Cookies for a pretty holiday tray, with buttery centers, a crisp pistachio coating, and bright raspberry jam.
Why These Thumbprints Need a Deep Well, Not a Wide One
A thumbprint has to do more than look pretty. The center needs enough depth to hold the jam below the top of the dough, while the surrounding rim stays substantial enough to frame the filling. A broad, shallow dent gives the jam nowhere to sit; as it warms in the oven, it can spread across the surface and soften the nut coating near the edge.
These cookies are small, so the filling portion matters just as much as the shape. A modest spoonful gives you a clear raspberry center without crowding the dough. The well should look deep before it goes into the oven, but the cookie still needs a solid base beneath the jam. Think of it as a little cup, not a hole punched through the dough. That balance keeps the filling visible and the pistachio-coated border intact, so the cookie has a tender bite instead of turning into a jammy, fragile disk.
What Gives the Dough Its Tender Crumb and the Coating Its Grip
- Butter — Softened unsalted butter creams smoothly with the sugar and gives the cookies their rich, tender texture. If salted butter is what you have, use it and leave out the added salt. It should be soft enough to beat, not melted or greasy.
- Eggs — The yolks bring richness to the dough, while the lightly beaten whites give the chopped pistachios something to adhere to. Keep the two parts separate; using the whole eggs in the dough leaves you without the coating wash and changes the dough’s moisture.
- All-purpose flour — It gives the dough enough structure to hold its shape around the jam. Measure it without packing it into the cup; too much flour can leave the dough dry and make the cookies crumbly.
- Pistachios — Unsalted shelled pistachios keep the coating from pushing the overall saltiness too far. Finely chopping them helps the pieces cover the round dough evenly, and fresh-tasting nuts matter here because their flavor is right on the outside of each cookie.
- Seedless raspberry jam — A smooth jam settles neatly into the center without seeds interrupting the soft filling. Choose one with a clear raspberry taste; the jam is a small part of each cookie, but it gives the butter-and-nut combination its tart counterpoint.
- Granulated sugar and vanilla — Sugar creams with the butter and adds sweetness without making the dough heavy. Vanilla rounds out the buttery flavor, so use an extract you enjoy rather than relying on it to cover up stale nuts or bland jam.
From Soft Dough to Jam-Filled Centers: The Stages That Matter
Cream the Butter, Then Stop Mixing When the Dough Comes Together
Beat the softened butter and granulated sugar with an electric mixer on medium speed until creamy, about 2 minutes. Add the egg yolks and vanilla, then mix in the flour and salt just until a soft dough forms. If the mixture still looks sandy, give it a little more time; stop as soon as it gathers, since extended mixing can make the cookies firm. The finished dough should feel soft and cohesive rather than greasy.
Give the Dough Its 30-Minute Chill
Cover the dough and refrigerate it for 30 minutes. This brief rest firms the butter so the balls are easier to roll and less likely to lose their shape on the baking sheet. While it chills, heat the oven to 350°F and line an 18×13-inch rimmed baking sheet with parchment paper. If the dough feels stiff when you begin shaping, work with it gently rather than warming the whole batch in your hands.
Coat Each Ball Before Pressing the Center
Lightly beat the egg whites in a small bowl and put the finely chopped pistachios in a shallow dish. Roll the dough into 1-inch balls, dip each one in egg white, let the excess drip off, and roll it in pistachios. Arrange the balls about 2 inches apart on the prepared sheet, then press a deep indentation into each center with your thumb or the rounded end of a 1/2-teaspoon measure. The dough should hold the well without splitting apart.
Fill Lightly and Bake Until the Edges Turn Golden
Spoon about 1/2 teaspoon of seedless raspberry jam into each indentation. Bake at 350°F for 12 to 15 minutes, until the edges are lightly golden and the cookies are set; the centers may still look soft. Leave the cookies on the baking sheet for 5 minutes so they can firm up before moving them. Transfer them to a wire rack and let them cool completely.
Three Easy Ways to Change the Jam, Coating, or Flour
Use Strawberry or Apricot Jam
Swap the seedless raspberry jam for seedless strawberry or apricot jam, keeping the same spoonful in each center. Strawberry stays sweet and familiar; apricot gives the cookies a gentler, less tart finish. Choose a smooth jam so it sits neatly in the indentation.
Trade Pistachios for Finely Chopped Almonds
Use finely chopped unsalted almonds in place of the pistachios for a milder, more familiar nut coating. Keep the pieces small so they cling to the egg-white-coated dough and don’t make the outside rough or patchy.
Make a Gluten-Free Batch
Replace the all-purpose flour with a cup-for-cup gluten-free flour blend designed for baking. The dough may feel a little more delicate, so chill it fully before rolling and handle the balls gently as you coat them. The cookies will still have the buttery, jam-filled shape, though the crumb can be slightly less tender than the original.
Storage and Reheating
- Room temperature: Store completely cooled cookies in an airtight container for up to 3 days. The pistachio coating softens a little as they sit.
- Freezer: Freeze cooled cookies in a sealed container with parchment between layers for up to 2 months. Thaw them at room temperature while still covered to limit condensation.
- Reheating: These are best at room temperature, so they don’t need reheating. Avoid microwaving them; the jam heats faster than the cookie and can become unexpectedly hot.
Questions That Come Up While Making These Thumbprints
Christmas Pistachio Raspberry Thumbprint Cookies
Ingredients
Equipment
Method
- Preheat the oven to 350°F.
- Line an 18x13-inch rimmed baking sheet with parchment paper.
- Beat the butter and sugar in a large bowl with an electric mixer on medium speed until creamy, about 2 minutes.
- Beat in the egg yolks and vanilla.
- Mix in the flour and salt just until a soft dough forms.
- Cover the dough and refrigerate for 30 minutes.
- Lightly beat the egg whites in a small bowl.
- Put the chopped pistachios in a shallow dish.
- Roll the dough into 1-inch balls.
- Dip each ball in egg white and let the excess drip off.
- Roll each ball in pistachios and arrange the balls about 2 inches apart on the prepared baking sheet.
- Press a deep indentation into the center of each ball with your thumb or the rounded end of a 1/2-teaspoon measure.
- Spoon about 1/2 teaspoon raspberry jam into each indentation.
- Bake at 350°F for 12 to 15 minutes, until the edges are lightly golden and the cookies are set.
- Cool the cookies on the baking sheet for 5 minutes.
- Transfer the cookies to a wire rack to cool completely.