
Red White and Blue Pretzel Salad
Sweet, salty, creamy, and crisp all show up in one chilled pan, which is why Red White and Blue Pretzel Salad disappears fast at potlucks and backyard cookouts. The pretzel…
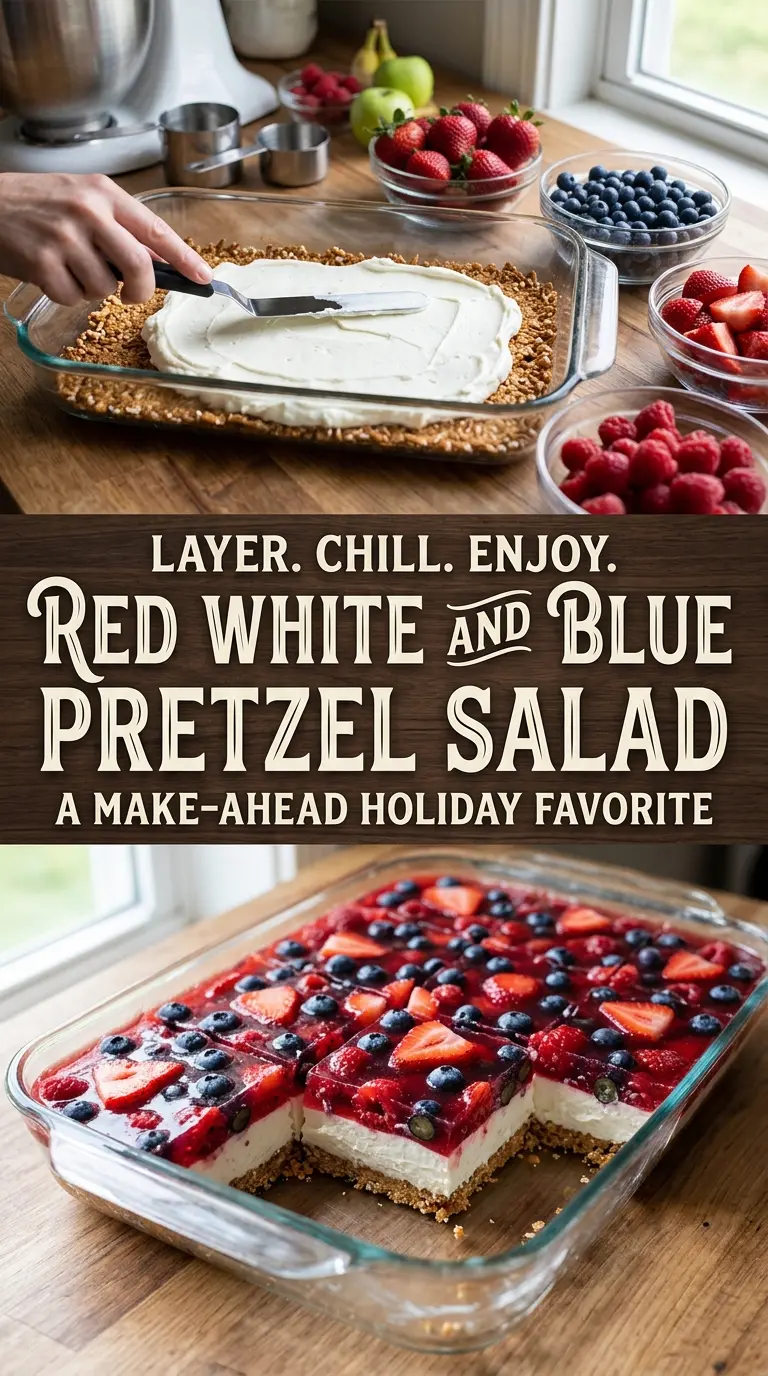
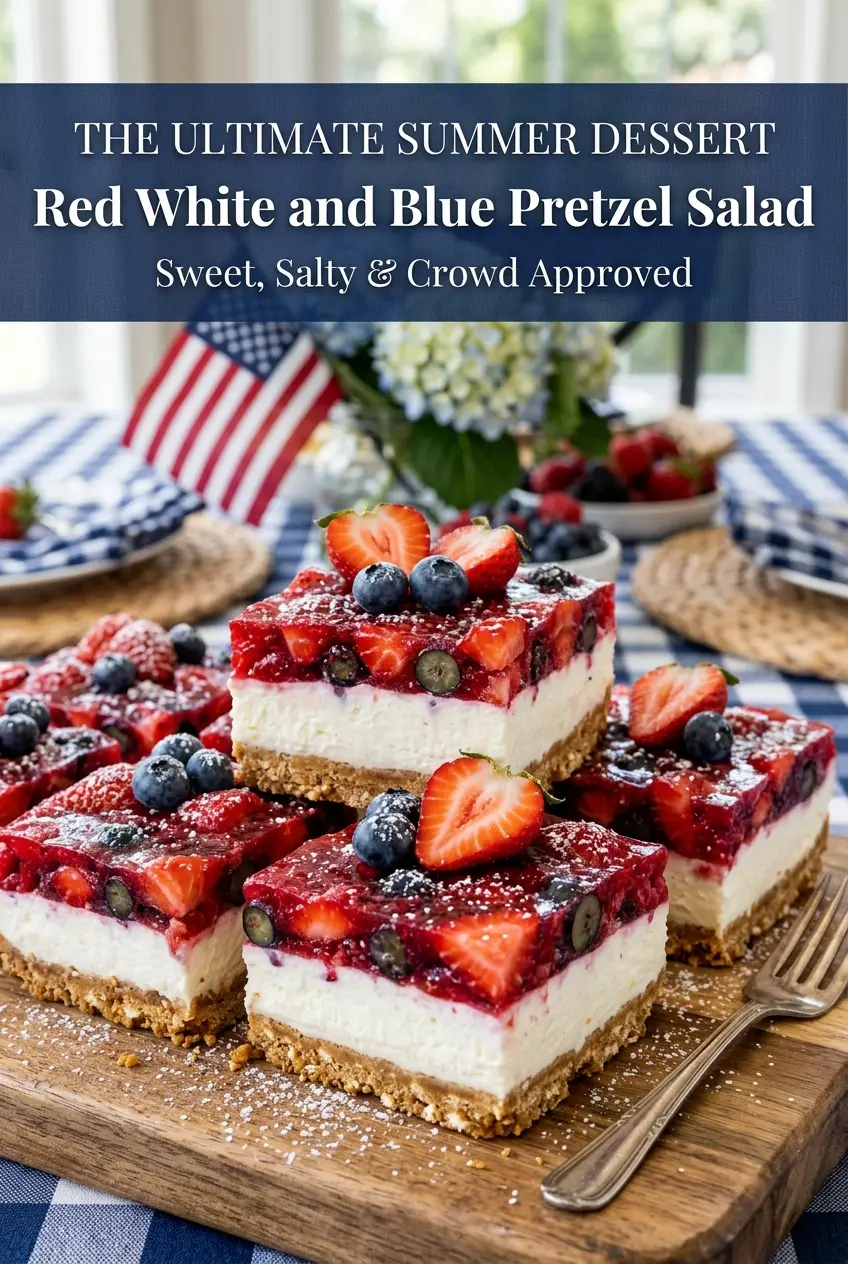
Tip: save now, cook later.Sweet, salty, creamy, and crisp all show up in one chilled pan, which is why Red White and Blue Pretzel Salad disappears fast at potlucks and backyard cookouts. The pretzel crust stays sturdy under a thick cheesecake layer, and the berry topping sets into glossy slices that hold their shape when you cut into them. It eats like a dessert, but that salty crunch at the bottom keeps it from feeling heavy.
The part that makes this version work is patience. The crust has to cool completely before the cream cheese layer goes on, or the filling softens and starts to slide. The gelatin also needs a short cooling period before it gets poured over the berries; if it goes in piping hot, it can melt the filling and muddy the fruit. That little bit of restraint is what gives you clean layers instead of a messy pan.
Below you’ll find the timing that matters most, plus a few smart swaps if you want to change the fruit or make it ahead for a crowd.
The crust stayed crunchy under the cream layer, and the gelatin set up cleanly without leaking into the filling. I made it the night before and the slices held together beautifully at our cookout.
Red White and Blue Pretzel Salad brings together a salty pretzel crust, creamy filling, and berry topping that’s made for clean, chilled slices.
The One Thing That Keeps the Layers Neat Instead of Slippery
This dessert looks simple, but the layers depend on temperature control. The crust needs to be fully cool before the cream cheese mixture goes on, because even a little residual heat softens the filling and makes the base soggy. The cream layer also needs to be spread all the way to the edges so the gelatin doesn’t seep down the sides and pool underneath.
The gelatin is the other place people get tripped up. If it goes over the berries while it’s still hot, the fruit can bleed and the cream layer can loosen. Let it cool until it’s no longer steaming and feels just slightly warm at the edge of the bowl. That gives you a clear top layer and berries that stay bright instead of turning dull.
- Pretzels — Use salted pretzels with good crunch. If they’re soft or stale, the crust turns dull instead of crisp. Crush them finely enough that the crust packs together, but leave a few small bits for texture.
- Butter — Melted butter binds the crust and helps it set into a firm base after baking. This is one place where real butter matters; margarine can leave the crust greasy and less structured.
- Cream cheese — Let it soften all the way to room temperature so it beats smooth. Cold cream cheese leaves little lumps that don’t fully disappear once the whipped topping goes in.
- Whipped topping — This keeps the filling airy and stable. If you swap in whipped cream, the layer will be lighter but softer, and it won’t hold as cleanly for long storage.
- Strawberries and blueberries — Fresh berries give the best color and texture. Frozen fruit leaks too much liquid and can turn the top watery unless you thaw, drain, and pat it very dry.
- Berry-flavored gelatin — This sets the topping into neat slices and adds the glossy finish that makes the dessert hold together. A plain strawberry gelatin works too if that’s what you have, but berry-flavored gelatin gives a slightly fuller fruit taste.
Building the Crust, Filling, and Fruit Layer Without a Soggy Bottom
Pressing and Baking the Pretzel Base
Stir the crushed pretzels, melted butter, and sugar until every piece looks coated, then press the mixture firmly into the baking dish. The crust should be packed tight enough that it feels almost like wet sand; loose crumbs fall apart when sliced later. Bake just until the edges smell toasted and the crust takes on a deeper golden color, then cool it completely before moving on. If you add the filling while it’s warm, the bottom softens and loses the salty crunch that makes this dessert worth making.
Whipping the Cream Layer
Beat the softened cream cheese and sugar until the mixture is smooth and glossy, with no grainy patches left on the sides of the bowl. Fold in the whipped topping gently so the filling stays light rather than dense. Spread it in an even layer right to the corners of the pan. Gaps at the edge let the gelatin slip down the sides, which is how the layers start to separate.
Setting the Berry Top
Dissolve the gelatin fully in boiling water, then let it cool for about 15 minutes until it’s no longer hot enough to melt the cream layer. Arrange the strawberries and blueberries over the filling before you pour, because the berries need a little structure to hold the gelatin where you want it. Pour slowly over the back of a spoon if you want extra control. Chill until the top is set and the slices cut cleanly, which usually takes at least 4 hours.
Three Ways to Make This Dessert Work for Different Kitchens
Gluten-Free Pretzel Salad
Swap in gluten-free pretzels and crush them the same way. The texture stays close to the original as long as you still bake the crust and let it cool completely before adding the filling.
Lighter Cream Layer
Use reduced-fat cream cheese if that’s what you have, but expect a softer filling. The dessert will still slice well after chilling, though the layer won’t taste quite as rich.
Mixed Berry Version
Raspberries or blackberries work well in place of part of the strawberries. Use fruit that’s sturdy and not overly juicy so the gelatin layer stays clear instead of turning cloudy.
Storage and Reheating
- Refrigerator: Keep covered and chilled for up to 3 days. The crust softens a little under the filling, but the dessert still slices well.
- Freezer: I don’t recommend freezing it. The cream layer and gelatin both change texture after thawing, and the berries can turn watery.
- Reheating: Don’t reheat this dessert. Serve it straight from the refrigerator for the cleanest layers and the best pretzel crunch.
Answers to the Questions Worth Asking
Red White and Blue Pretzel Salad
Ingredients
Equipment
Method
- Preheat oven to 350°F (175°C).
- Mix crushed pretzels, melted unsalted butter, and granulated sugar until evenly combined.
- Press the pretzel mixture into a 9x13-inch baking dish to form an even crust.
- Bake for 10 minutes at 350°F (175°C), until set and lightly fragrant.
- Cool the crust completely, so the next layer won’t melt.
- Beat the cream cheese and granulated sugar until smooth.
- Fold in the whipped topping until no streaks remain.
- Spread the cream cheese mixture over the cooled pretzel crust.
- Refrigerate until ready for the berry layer.
- Dissolve the berry-flavored gelatin in the boiling water until fully clear.
- Cool the gelatin for 15 minutes, until slightly thickened but still pourable.
- Arrange the strawberries and blueberries over the cream layer.
- Carefully pour the gelatin mixture over the berries, covering them evenly.
- Refrigerate for at least 4 hours to set completely.
- Slice and serve chilled.