

Fun & Easy Halloween Rice Krispie Treats Kids Will Love
The butter turns glossy first, then the marshmallows slowly collapse into a smooth, stretchy mixture. That’s the moment to take the pot off the heat—not after it starts bubbling or…
Tip: save now, cook later.The butter turns glossy first, then the marshmallows slowly collapse into a smooth, stretchy mixture. That’s the moment to take the pot off the heat—not after it starts bubbling or browning. These Halloween Rice Krispie treats get their bright orange color right in the warm marshmallow base, so the cereal stays crisp and the color spreads evenly without extra bowls.
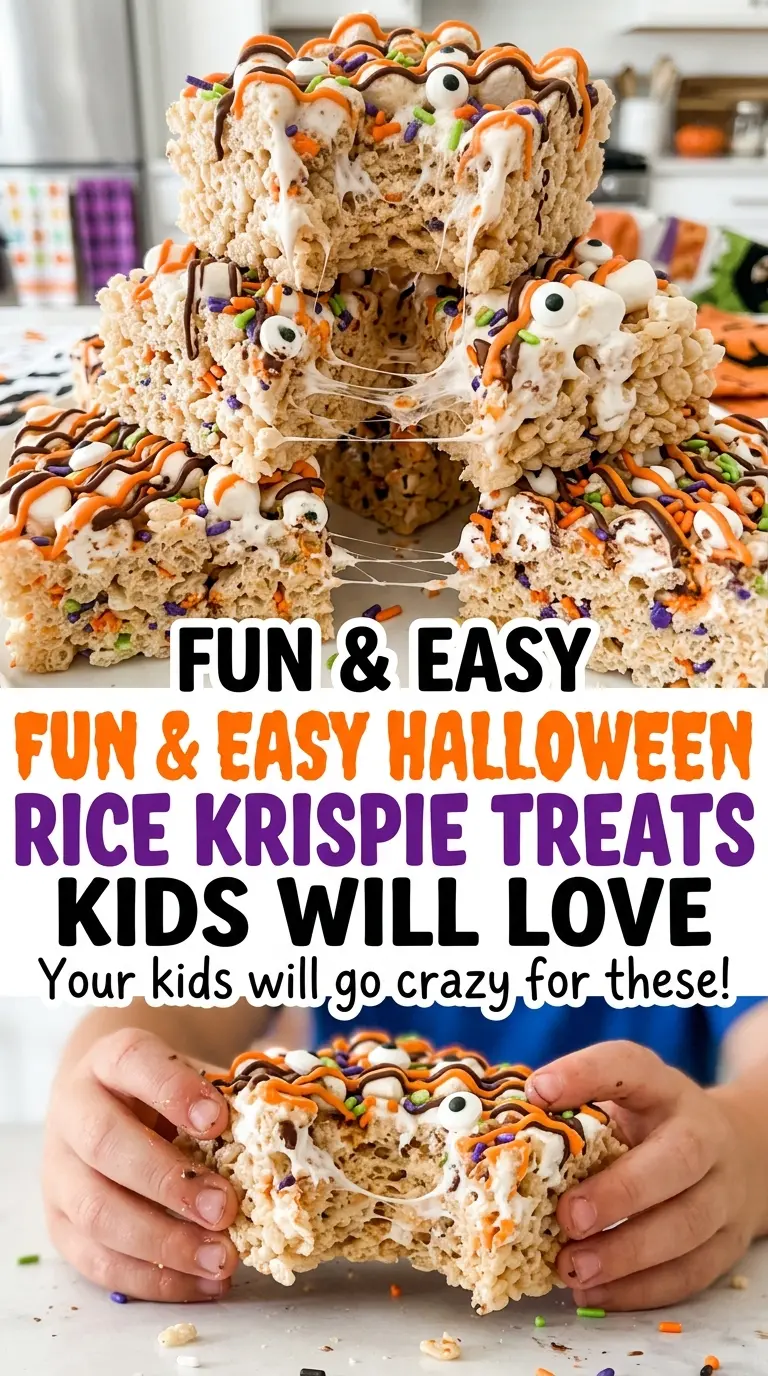
I like that the decorations go on while the mixture is still soft: the sprinkles settle into the surface, and the candy eyeballs stay put when you press them in gently. A lightly greased spatula keeps the cereal mixture from clinging as you shape it in the pan. Once the treats have cooled, you get tidy squares with a chewy center, orange edges, and little pops of Halloween color.

Kitchen Note
Press the mixture into the pan just enough to make an even layer. A firm pack makes the squares dense; a light touch leaves them tender and easy to bite.
Save these Halloween Rice Krispie treats for a batch of orange, chewy squares topped with candy eyes and festive sprinkles.
Why Low Heat Matters More Than a Fast Melt
Marshmallows look like they should melt quickly, but turning up the burner can work against you. A hot pot can scorch the butter or overheat the sugar before the marshmallows have melted into a smooth mixture. When that happens, the finished squares are more likely to feel stiff instead of chewy. Low heat gives the marshmallows time to soften without browning, and stirring keeps the mixture moving as it melts.
That slow melt also gives you a useful visual cue: the mixture should look smooth and uniform, with no firm marshmallow pieces left. Take the pot off the burner once it reaches that point rather than continuing to cook it. The cereal only needs a coating of the warm mixture; it doesn’t need extra heat. This small bit of patience keeps the base soft enough to spread and helps the treats hold together without turning hard.
What Gives These Halloween Squares Their Color, Chew, and Crunch
- Mini marshmallows — They melt into the binder that holds the cereal together, and their small size helps them soften evenly. Choose a fresh bag; marshmallows that have dried out can take longer to melt and leave stubborn pieces. Regular-size marshmallows work as a substitute when used by weight; cut them into smaller pieces so they melt more evenly.
- Unsalted butter — Butter keeps the marshmallow mixture supple and adds a mellow richness. Unsalted butter gives you control over the seasoning, while a good everyday butter is all you need here; there’s no need for a specialty brand.
- Crispy rice cereal — The cereal provides the light crunch that balances the sticky marshmallow base. For a gluten-free batch, replace it with certified gluten-free crisp rice cereal in the same volume. The squares will keep their crisp, airy texture.
- Orange gel food coloring — Gel coloring delivers a strong orange shade without adding much liquid. If you only have liquid food coloring, add it a little at a time; it’s less concentrated, and using a lot can make the mixture looser.
- Vanilla extract — Vanilla rounds out the sweetness rather than competing with the Halloween decorations. Pure or imitation vanilla both work; pure vanilla has a fuller aroma, but imitation is fine in a cereal treat.
- Halloween sprinkles and candy eyeballs — These give the top its festive look and a little extra crunch. Any Halloween sprinkle mix works, and the candy eyes are easiest to press into the surface while the mixture is still soft.
How to Melt, Color, and Shape the Treats Without a Sticky Mess
Prepare the Pan Before the Marshmallows Melt
Lightly coat a 9×13-inch baking pan with nonstick cooking spray before you start heating the butter. Once the cereal is coated, the mixture begins to cool and gets harder to move, so having the pan ready keeps you from rushing. Set out a spatula and lightly grease it as well. That thin coating helps the sticky mixture release as you spread it.
Melt the Marshmallows Until Smooth
Melt the butter in a large pot over low heat, then stir in the mini marshmallows. Keep stirring for 5 to 7 minutes, until they’re completely melted and the mixture looks smooth. If you still see firm marshmallow pieces, keep stirring over low heat rather than raising the burner. Browning or bubbling isn’t the goal here.
Color the Mixture Off the Heat
Take the pot off the heat before adding the orange gel food coloring. Stir until the color looks even, then mix in the vanilla extract and kosher salt. Coloring off the burner gives you a little time to adjust the shade without continuing to cook the marshmallow base. Add the cereal after the color and flavorings are blended in.
Coat the Cereal and Add the Decorations
Tip the crispy rice cereal into the pot and fold gently until the pieces are evenly coated. Work carefully so you keep the cereal crisp rather than crushing it into a dense mixture. Transfer it to the prepared pan and spread it into an even layer with the greased spatula. Scatter the sprinkles and candy eyeballs over the top, then press them in gently so they stay in place.
Cool Before Cutting the Squares
Leave the pan at room temperature for about 1 hour before cutting the treats into 12 squares. The surface should feel set rather than tacky, and the middle should hold together when you slice it. Cutting while the mixture is still warm can pull the cereal and decorations out of place. Once cool, lift and cut the squares carefully so the candy eyes stay on top.
Easy Ways to Change the Color or Make a Gluten-Free Batch
Make a Purple Monster Batch
Use purple gel food coloring in place of the orange gel. Stir it into the marshmallow mixture off the heat, then finish with the same sprinkles and candy eyeballs for a different Halloween look without changing the chewy texture.
Use Gluten-Free Crisp Rice Cereal
Replace the crispy rice cereal with certified gluten-free crisp rice cereal, using the same volume. The finished treats stay crunchy and chewy, though the cereal’s toasted flavor can vary a little by brand.
Arrange the Candy Eyes as Monster Faces
Group the candy eyes in pairs across the top instead of scattering them individually. Each square gets a little monster-face look, and the same toppings still give you a bright, festive finish.
Storage and Reheating
- Refrigerator: Not recommended; the cold makes the treats firm and less pleasant to bite.
- Freezer: Freeze the squares individually wrapped, then store them together in an airtight container for up to 6 weeks. Thaw at room temperature before serving.
- Reheating: No reheating is needed. Microwaving can make the marshmallow sticky and soften the cereal crunch.
Questions That Come Up When Making Halloween Rice Krispie Treats
Fun & Easy Halloween Rice Krispie Treats Kids Will Love
Ingredients
Equipment
Method
- Lightly coat a 9x13-inch baking pan with nonstick cooking spray.
- Melt the butter in a large pot over low heat.
- Add the marshmallows and stir for 5 to 7 minutes, until completely melted and smooth.
- Remove the pot from the heat.
- Stir in orange gel food coloring until the mixture is the color you want.
- Stir in the vanilla and salt.
- Add the cereal and stir gently until evenly coated.
- Transfer the mixture to the prepared pan and gently press it into an even layer with a lightly greased spatula.
- Scatter the sprinkles and candy eyeballs over the top and gently press them in.
- Let the treats cool at room temperature for about 1 hour.
- Cut into 12 squares.