
Red and Blue Ice Cream
Red and Blue Ice Cream turns a simple no-churn base into a frozen dessert that looks playful, slices cleanly, and melts into creamy spoonfuls with ribbons of strawberry and blueberry…
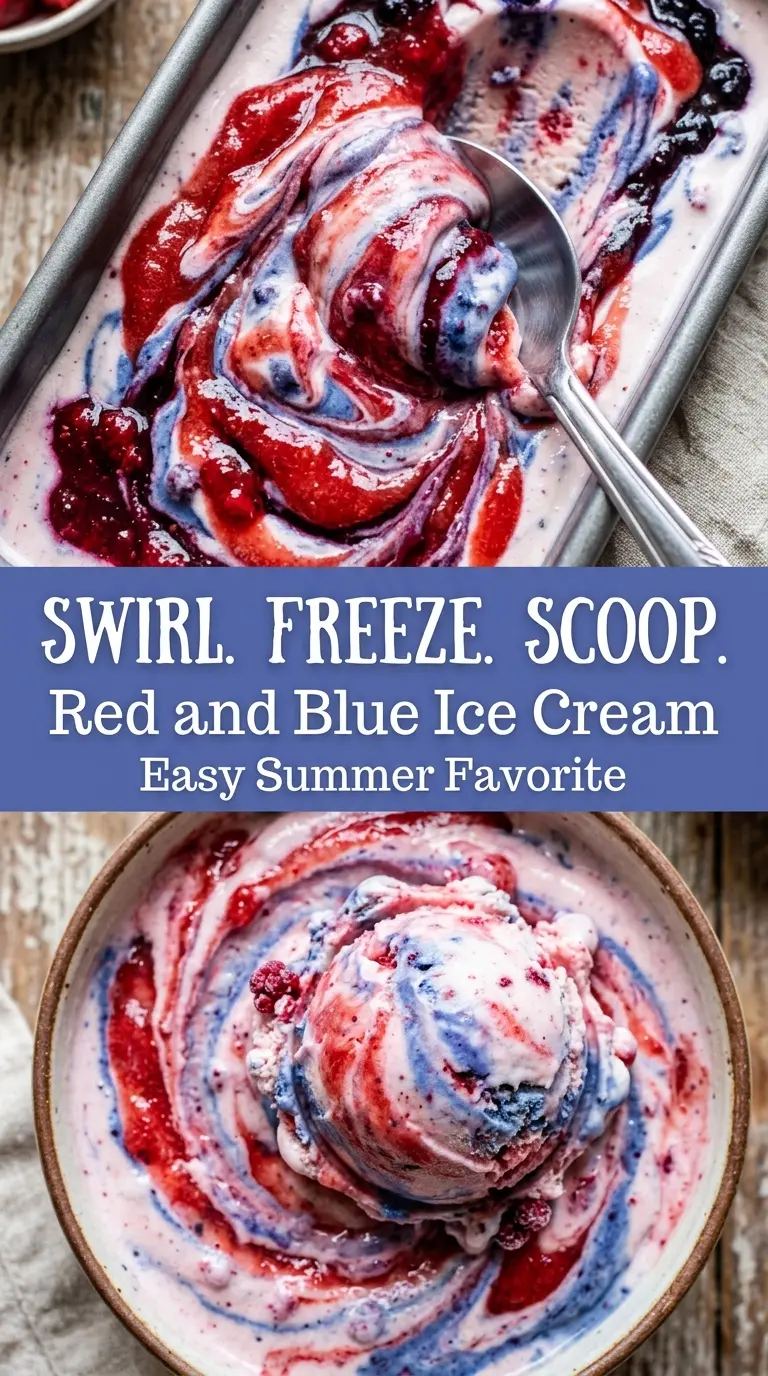
Tip: save now, cook later.Red and Blue Ice Cream turns a simple no-churn base into a frozen dessert that looks playful, slices cleanly, and melts into creamy spoonfuls with ribbons of strawberry and blueberry running through every scoop. The contrast is what makes it special: a soft vanilla backdrop, bright fruit swirls, and bold patriotic color that holds its shape instead of bleeding into one muddy shade.
The trick is keeping the base light before it goes into the freezer. Whipped cream gives the ice cream its body, while sweetened condensed milk keeps it smooth without an ice cream machine. The fruit sauces work best when they’re thick, not watery, so they stay in ribbons instead of disappearing into the cream. A gentle swirl is enough; overmixing is what turns those pretty layers into a single pastel blend.
Below, I’ve included the small details that help the colors stay distinct, plus a few easy ways to adapt the batch for different flavors or make-ahead timing.
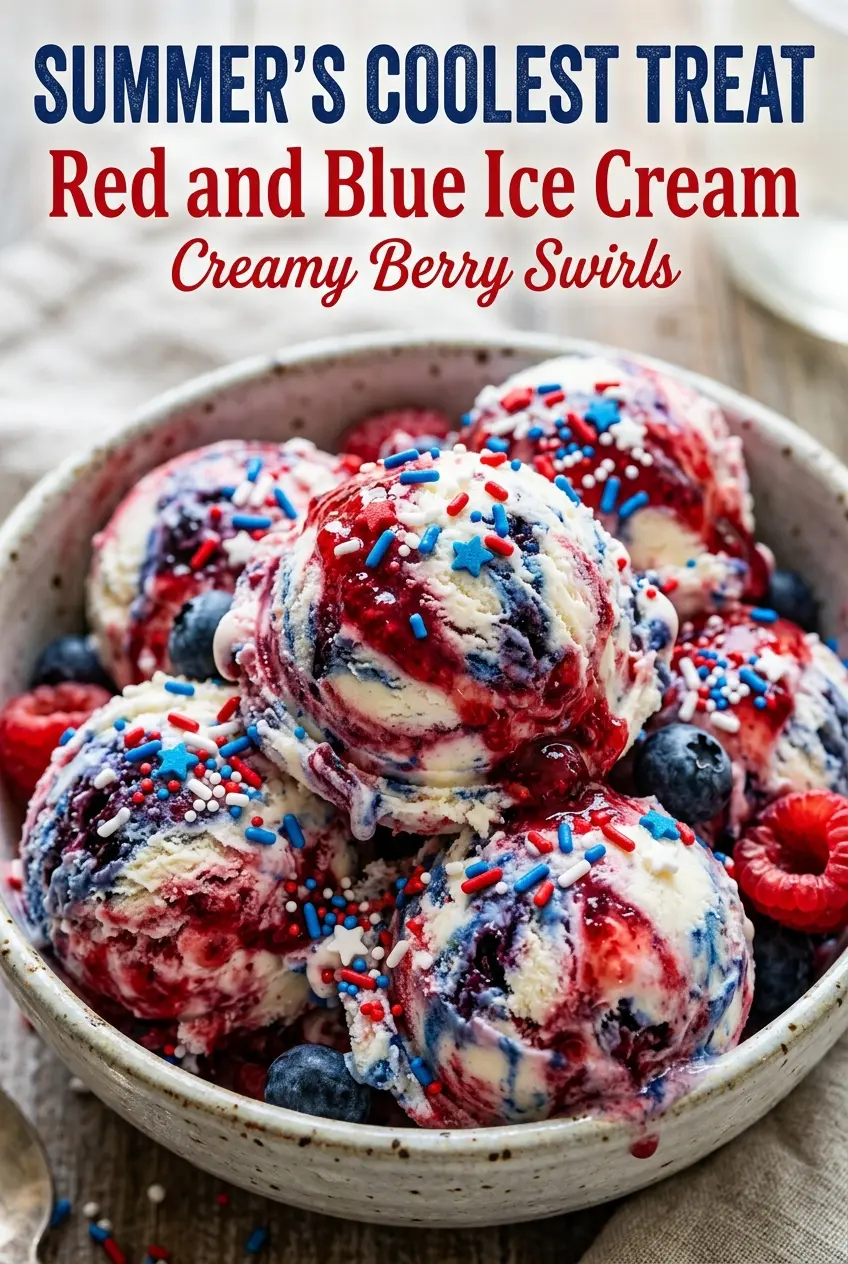
The ice cream stayed creamy after freezing overnight, and the strawberry and blueberry ribbons showed up in every scoop instead of sinking to the bottom. My kids kept asking for the red one and the blue one, and the texture was smooth enough to scoop straight from the freezer.
Keep this red, white, and blue ice cream on hand for a patriotic dessert that swirls up beautifully in every scoop.
The Secret to Keeping the Swirls Separate Instead of Muddied
Red and blue ice cream looks simplest when it’s layered, but the part that trips people up is the swirl. The base is soft enough to fold and spoon easily, which means the fruit sauces and food coloring can spread fast if you overwork them. A few deliberate turns of a knife or skewer create those ribbons you want; keep going and the colors lose their definition.
The other thing that matters is thickness. Thin sauce sinks and streaks the whole pan, while a thicker strawberry or blueberry sauce stays suspended in the ice cream and freezes as distinct pockets of flavor. If your sauce is runny, cook it down a little first or chill it completely before adding it. Warm sauce will soften the base and collapse the pattern before the freezer has a chance to set it.
- Heavy whipping cream — This is what gives the ice cream its structure without churning. Whip it to stiff peaks so the base holds air and freezes creamy instead of icy.
- Sweetened condensed milk — It adds sweetness and keeps the texture soft straight from the freezer. There isn’t a true one-for-one substitute here; if you swap it out, the ice cream won’t stay as smooth.
- Vanilla extract — Vanilla gives the white base enough flavor to stand up to the fruit swirls. Use the real stuff if you can, because the flavor gets concentrated as the ice cream freezes.
- Strawberry sauce and blueberry sauce — These should be thick enough to ribbon through the base. If you’re using store-bought sauce, reduce it on the stove for a few minutes so it doesn’t turn the whole batch watery.
- Gel food coloring — Gel gives you strong red and blue without thinning the mixture. Liquid coloring works in a pinch, but you’ll need more of it and the shades won’t be as vivid.
Building the Base Without Deflating It
Whipping the Cream First
Start by whipping the cream until it reaches stiff peaks, meaning the tip stands up when you lift the beaters. Stop there. If you go past that point, the cream starts looking grainy and can lose the smooth texture that makes no-churn ice cream work. A cold bowl helps the cream whip faster and hold its shape longer.
Folding, Not Stirring
Mix the sweetened condensed milk with the vanilla first, then fold in the whipped cream in batches. Use a spatula and bring the mixture from the bottom of the bowl up over the top so you don’t knock out the air. If you stir hard, the base tightens up and freezes denser, more like a block than ice cream.
Layering the Colors
Divide the mixture into three bowls, leaving one plain, then tint the others red and blue with gel coloring. Spoon the colors into the loaf pan in alternating patches rather than dumping one color over another. Add the fruit sauce in small dollops on top, then drag a knife through just enough to create ribbons. A deep swirl pattern looks prettier in the pan, but too much movement is what causes the colors to blend into one another.
Three Easy Ways to Adapt the Pan
Make It Dairy-Free
Swap the heavy cream for a full-fat coconut whipping cream and use a dairy-free sweetened condensed milk alternative. The texture stays rich, though you’ll pick up a light coconut note. It still freezes well, but the base may scoop a little firmer than the dairy version.
Keep the Colors, Skip the Food Dye
Use extra strawberry sauce for the red layer and blueberry sauce for the blue layer, then leave the middle layer plain. The color will be softer and more natural, and the fruit flavor comes through a little more clearly. The result is less vivid than gel coloring, but it still reads festive.
Turn It Into a Smaller Batch
Halve every ingredient and use a smaller loaf pan or freezer-safe container. The ice cream will freeze a bit faster, which is handy if you’re short on time. Just keep an eye on the swirl amount, since a smaller batch can look overmixed faster than a full pan.
Storage and Reheating
- Refrigerator: Not recommended. This needs the freezer and will melt quickly once it sits out.
- Freezer: Store covered for up to 2 weeks for the best texture. After that, it can start picking up ice crystals around the edges.
- Reheating: Let it sit at room temperature for 5 to 10 minutes before scooping. If it’s rock hard, it’s been frozen too long or stored uncovered, and a brief rest softens it enough to scoop without smashing the swirls.
Answers to the Questions Worth Asking
Red and Blue Ice Cream
Ingredients
Equipment
Method
- Whip the heavy whipping cream until stiff peaks form, 5 to 8 minutes, using a stand mixer on medium-high speed; it should hold tall peaks when you lift the beaters.
- In a separate bowl, combine sweetened condensed milk and vanilla extract until smooth, 30 to 60 seconds, with no visible streaks.
- Fold the whipped cream into the condensed milk mixture until evenly combined and creamy, 1 to 2 minutes, keeping the texture light.
- Divide the mixture into three bowls.
- Leave one bowl white and color one bowl red and another blue using the red gel food coloring and blue gel food coloring; mix just until the color is uniform.
- Alternate spoonfuls of each colored mixture into a loaf pan so red and blue stripes appear as you build the layer.
- Add small spoonfuls of strawberry sauce and blueberry sauce across the top, spacing them so ribbons form instead of fully mixing.
- Swirl gently with a spoon or knife tip to create colorful ribbons, 10 to 20 seconds, stopping before the colors fully blend.
- Add patriotic sprinkles if desired, scattering lightly so they don’t sink immediately.
- Freeze the ice cream for at least 6 hours, until firm enough to scoop; cover the pan to prevent ice crystals.
- Scoop and serve once set, using firm pressure to cut clean portions.