Red White & Blue Marble Ice Cream
Red White & Blue Marble Ice Cream lands on the table with the kind of scoopable creaminess that makes people stop talking for a second. The vanilla base stays soft…
Tip: save now, cook later.Red White & Blue Marble Ice Cream lands on the table with the kind of scoopable creaminess that makes people stop talking for a second. The vanilla base stays soft enough to scoop cleanly, while the berry ribbons cut through with bright fruit flavor instead of turning the whole pan into one muddy color. That contrast is what makes this version worth keeping around. It looks festive, but the real win is how balanced it tastes and how smooth it stays after freezing.
The texture depends on building enough air into the cream before folding in the sweetened condensed milk. That step gives the finished ice cream its light, plush body without an ice cream machine. The second thing that matters is restraint with the swirling. A few confident passes with a knife give you clean red, white, and blue ribbons; too much swirling blends everything into pale purple and the marble effect disappears.
Below, you’ll find the small details that keep the layers distinct, the easiest way to get vivid color without watering down the base, and a few smart variations if you want to change the fruit or skip the sprinkles.
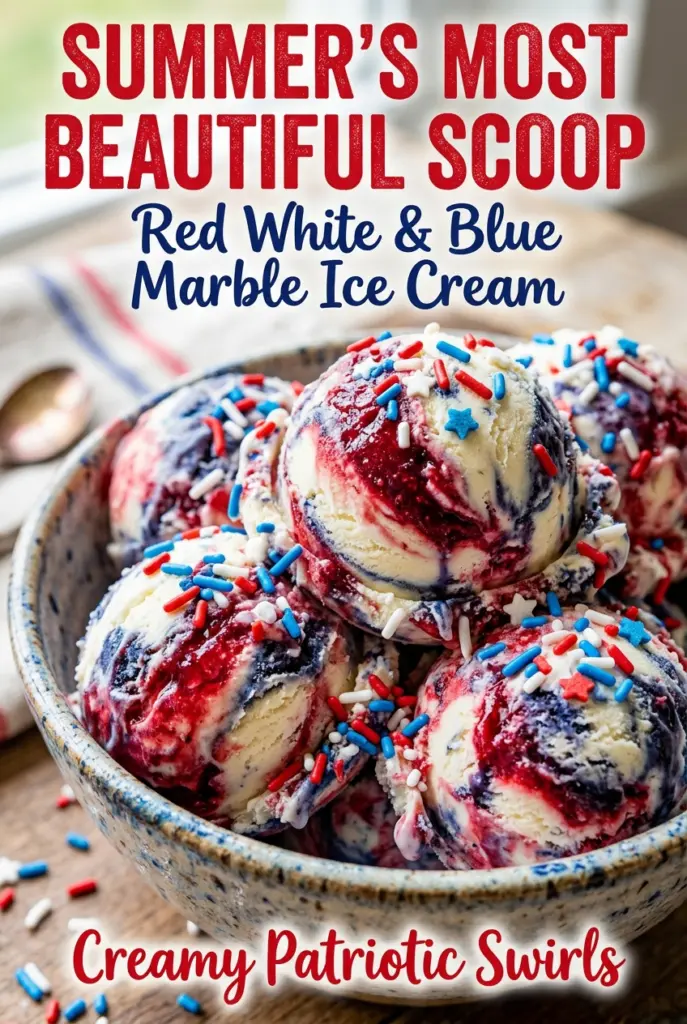
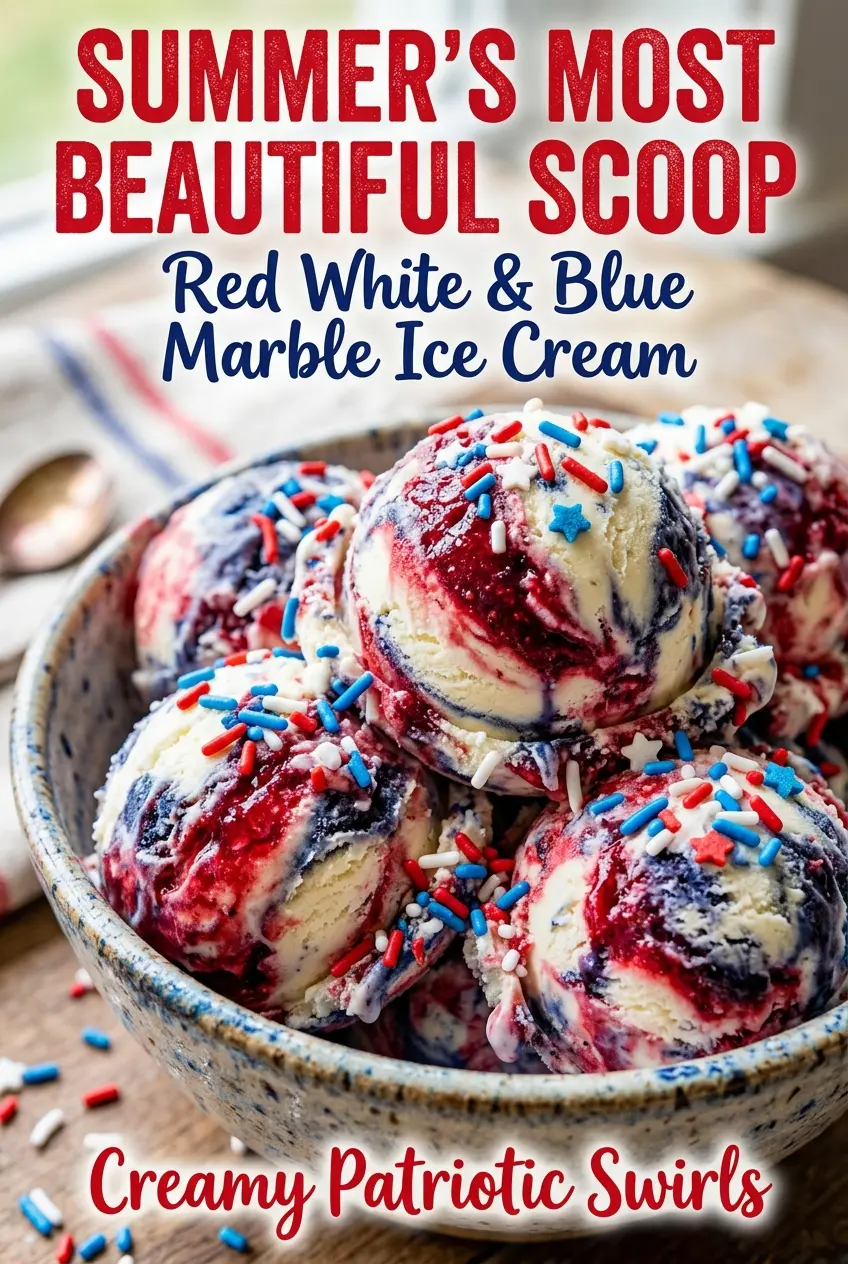
The berry ribbons stayed distinct after freezing, and the texture was creamy enough to scoop straight from the freezer without letting it sit forever. My kids kept digging for the red and blue swirls.
Like this marble swirled ice cream? Save it to Pinterest for the next cookout when you want a festive dessert with a creamy vanilla base and bright berry ribbons.
The Swirl That Keeps the Colors Clean Instead of Turning Them Muddy
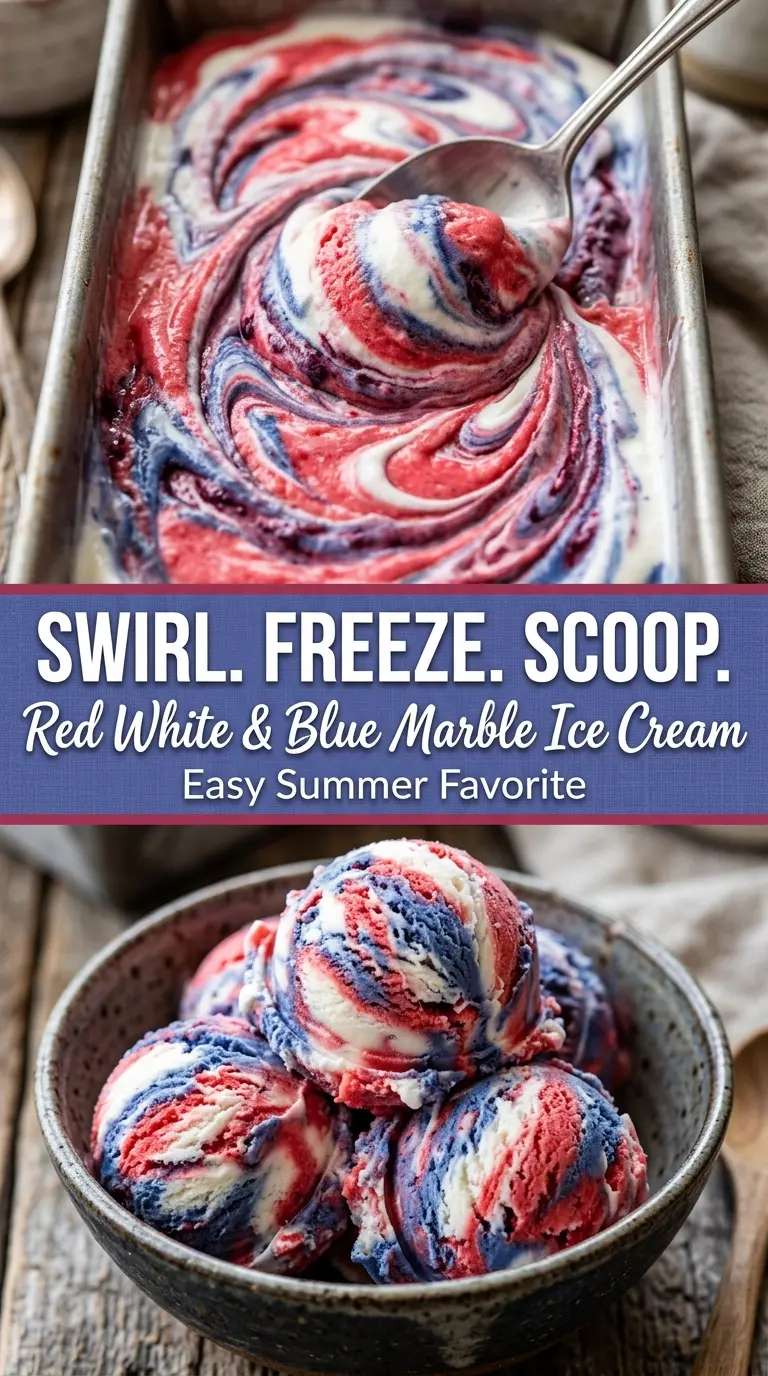
The biggest mistake with layered homemade ice cream is overmixing at the end. Once the red and blue portions hit the pan, the goal is not a full blend. It’s a few intentional swirls that leave pockets of each color visible so every scoop looks striped instead of tinted one flat shade.
The berry sauces matter here because they bring both color and flavor. Thick syrup or a cooked-down fruit sauce works better than thin jam mixed with water, which tends to disappear into the base. If your sauces are loose, chill them first so they sit on top of the cream a little longer before you swirl.
- Heavy whipping cream — This is what gives the ice cream its body without a machine. It needs to be whipped to stiff peaks, not soft ones, or the base will freeze denser and icier.
- Sweetened condensed milk — It sweetens and softens the finished dessert while keeping the texture smooth. There isn’t a clean swap here if you want the same no-churn result.
- Vanilla extract — The vanilla keeps the berries from tasting sharp or one-note. Use real vanilla if you can, because the base has so few ingredients that each one matters.
- Red gel food coloring and blue gel food coloring — Gel coloring gives strong color without thinning the mixture. Liquid coloring can work in a pinch, but you’ll need more of it and the base can get looser.
- Red berry syrup and blueberry sauce — These do double duty as color and flavor. A thick fruit topping or cooked berry compote works best; thin fruit juice will bleed into the cream and won’t hold the marble effect.
- Patriotic sprinkles — Optional, but they add a little crunch and make the top look finished. Add them just before freezing so they don’t bleed color into the surface.
Building the Base and Swirling It Before the Freeze
Whipping the Cream to Stiff Peaks
Start with cold cream and whip until the beater lifts firm peaks that stand straight instead of drooping. That structure is what traps air and gives the ice cream its creamy, scoopable texture. If you stop too soon, the finished dessert freezes heavier and more like a block. If you whip past stiff peaks, the cream starts to look grainy and can turn buttery when folded.
Folding Without Deflating
Stir the condensed milk and vanilla together first, then fold in the whipped cream with a spatula. Use broad strokes and scrape from the bottom of the bowl so you keep as much air as possible. The mixture should look thick, pale, and uniform when you’re done. If you stir hard, you knock out the air and lose the soft texture that makes no-churn ice cream work.
Layering the Colors
Divide the base into three bowls, leaving one white and tinting the others red and blue. Spoon the colors into the loaf pan in alternating patches, not neat stripes, so the swirls have somewhere to move. Thick spoonfuls sit on top better than thin drizzles. If the food coloring looks weak, add it a drop at a time until the shade is vivid, because the color will mellow slightly once frozen.
Swirling and Freezing
Add small spoonfuls of berry syrup and blueberry sauce over the top, then run a butter knife through the pan just a few times. You want visible ribbons, not a blended pastel mix. Finish with sprinkles if you’re using them, then freeze until the center is firm, at least 6 hours or overnight. If you try to scoop it too early, the middle will slump and the ribbons won’t hold their shape.
What to Change When You Want a Different Berry, or No Dairy at All
Make it dairy-free
Use full-fat coconut cream in place of the heavy whipping cream and a sweetened dairy-free condensed milk substitute. The texture will be a little less neutral and you’ll taste the coconut, but it still freezes into a creamy scoop. Keep the berry sauces thick so the base doesn’t turn icy.
Swap the berry sauces
Raspberry sauce and strawberry sauce both work in place of the red berry syrup, and a blackberry sauce can stand in for blueberry if that’s what you have. The key is using sauces that are thick enough to sit in ribbons. Thin fruit sauces sink and blur the marbling.
Skip the food coloring
If you’d rather avoid gel coloring, leave one bowl plain and let the fruit sauces provide the red and blue tones. The finished ice cream will look softer and more natural, though the white base won’t pop as sharply. The flavor stays the same; you just lose some of the bold color contrast.
Storage and Freezing
- Refrigerator: Not recommended. This dessert is meant to stay frozen, and it will melt into a loose cream mixture if left in the fridge.
- Freezer: Store tightly covered for up to 2 weeks. Press parchment or plastic wrap directly on the surface to reduce ice crystals.
- Serving: Let it sit at room temperature for 5 to 10 minutes before scooping. If it’s rock hard, the first scoop will crack the top instead of sliding through cleanly.
Answers to the Questions Worth Asking
Red White & Blue Marble Ice Cream
Ingredients
Equipment
Method
- Whip the heavy whipping cream until stiff peaks form.
- In a separate bowl, mix the sweetened condensed milk and vanilla extract until smooth.
- Fold the whipped cream into the condensed milk mixture until no streaks remain.
- Divide the mixture into three bowls.
- Leave one bowl white.
- Tint one bowl red and another blue using the red gel food coloring and blue gel food coloring.
- Alternate spoonfuls of each color into a loaf pan, layering them side by side.
- Add small spoonfuls of red berry syrup and blueberry sauce over the top.
- Swirl gently with a butter knife to create a marble effect, using light passes to keep ribbons distinct.
- Sprinkle with patriotic sprinkles if desired.
- Freeze for at least 6 hours or overnight until firm.
- Scoop and serve.